Company security settings
Companies on our Team and Enterprise plans have more comprehensive security settings compared to those on the Pro and Personal plans. This is done to ensure compliance with their governance and regulatory policies and to give them more control over who can access their company’s documents on DocuX.
User lockout
User lockout is a security measure to prevent unauthorized logins. It prevents users from logging in if they make multiple failed login attempts.
To switch on user lock out:
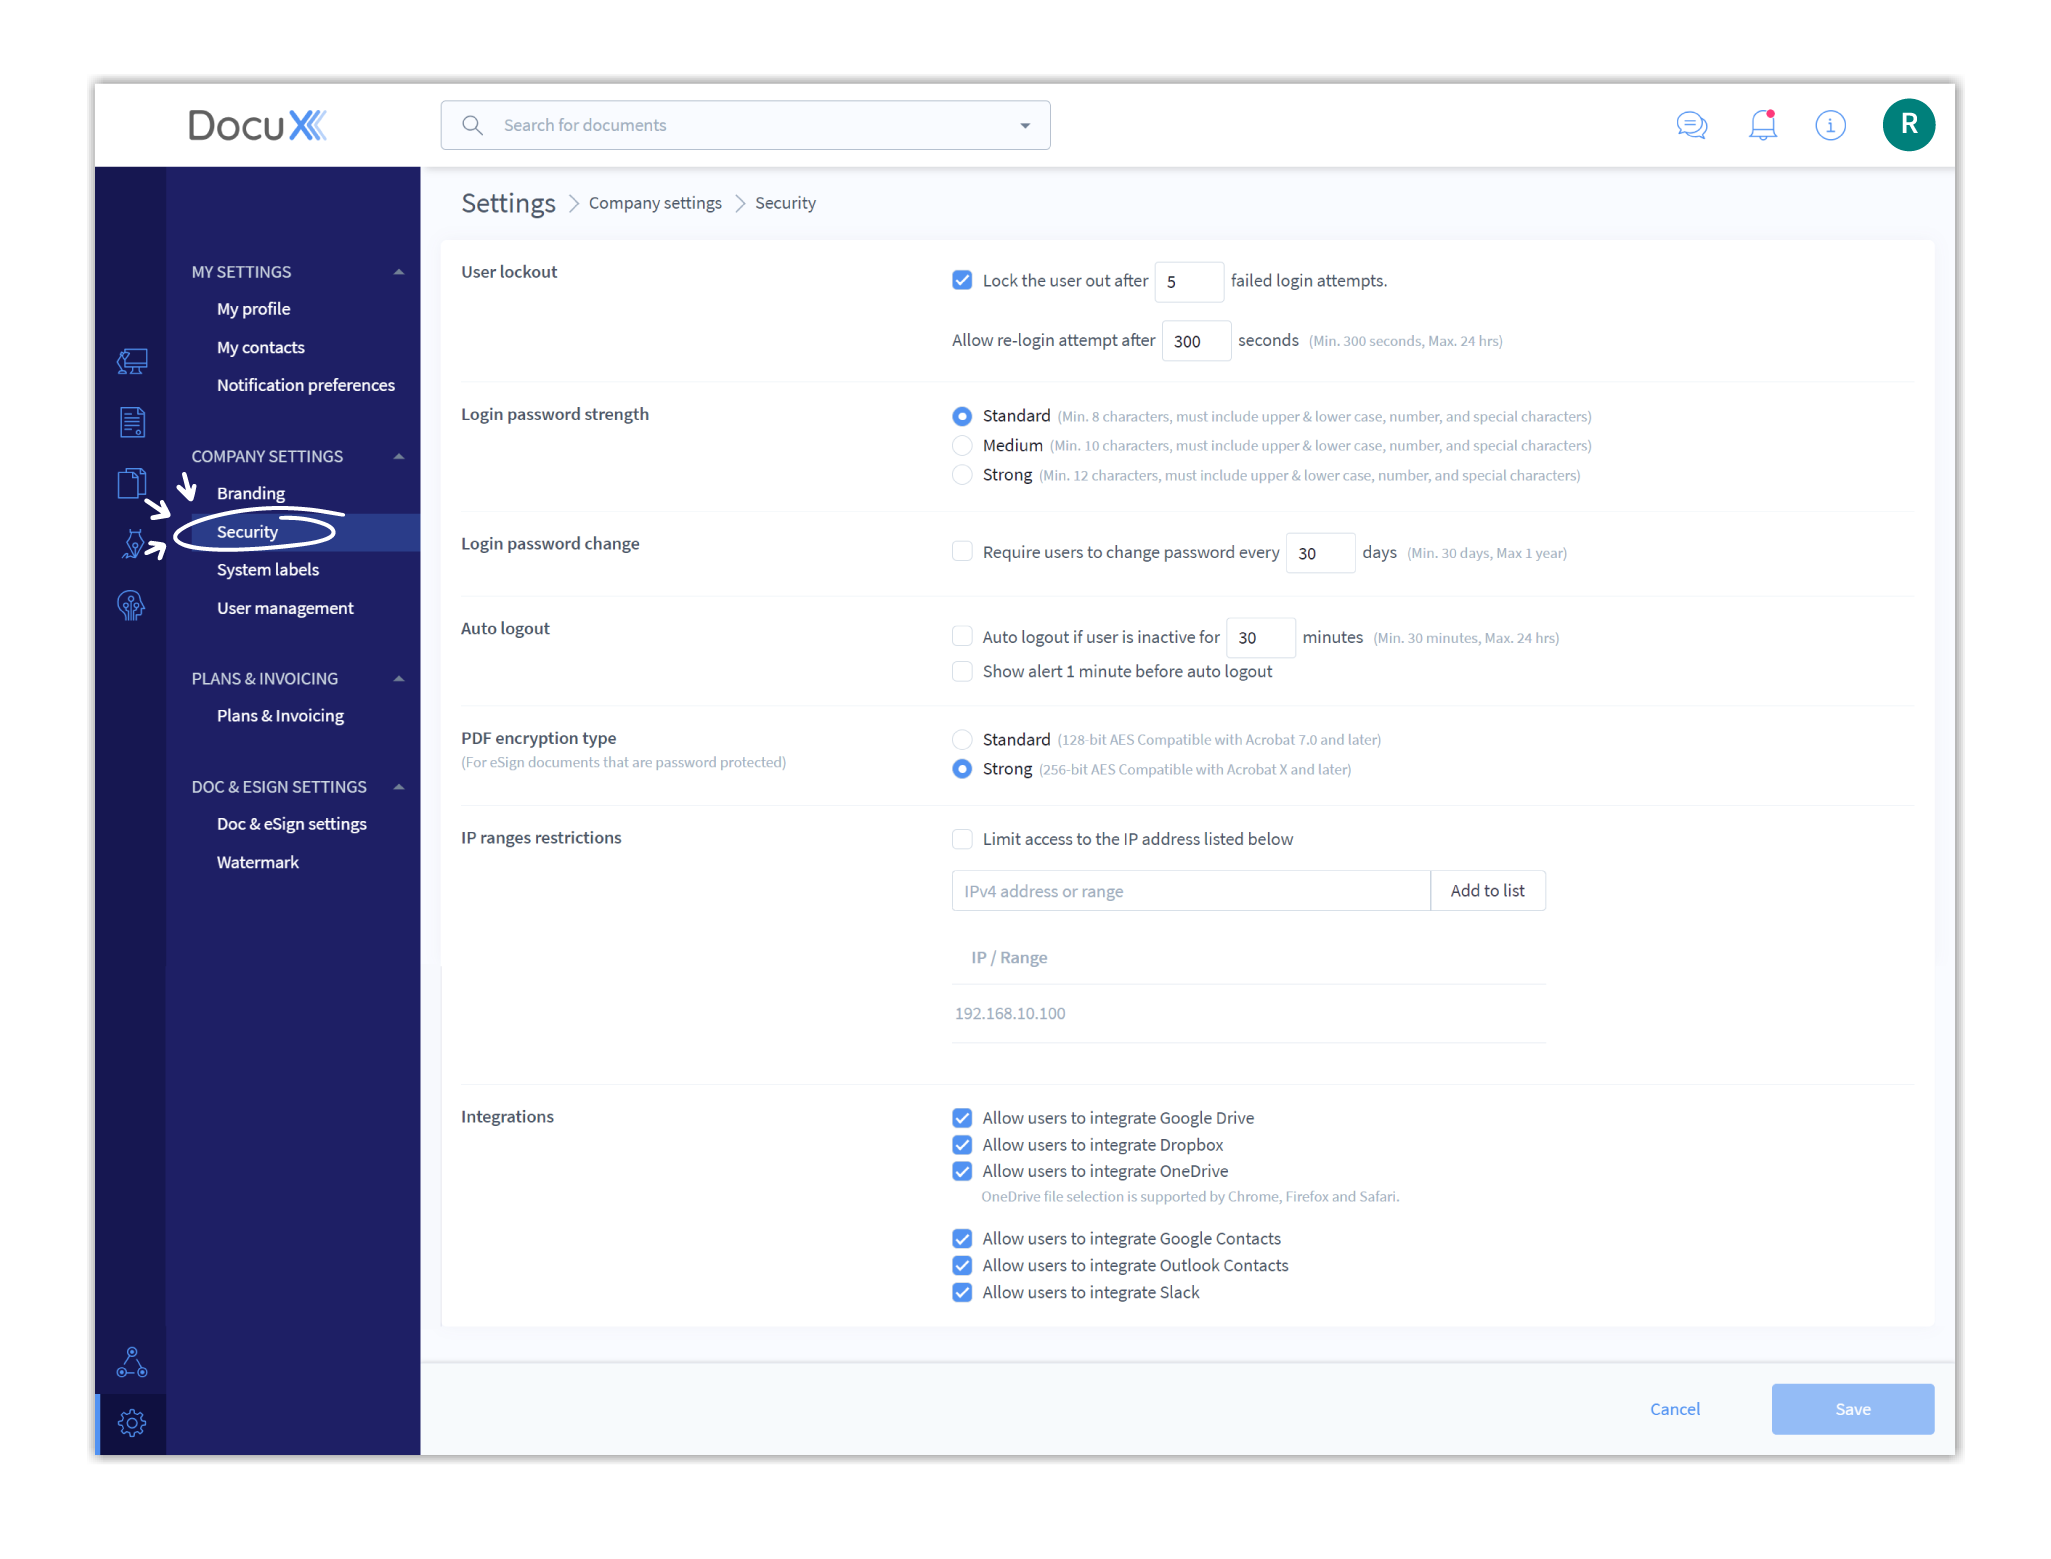
- Click on Settings in the bottom left corner of your DocuX screen.
- Click on Security under Company settings.
- Select the check box along side the User lockout label. The check box will be blue when selected, indicating the setting is switched on.
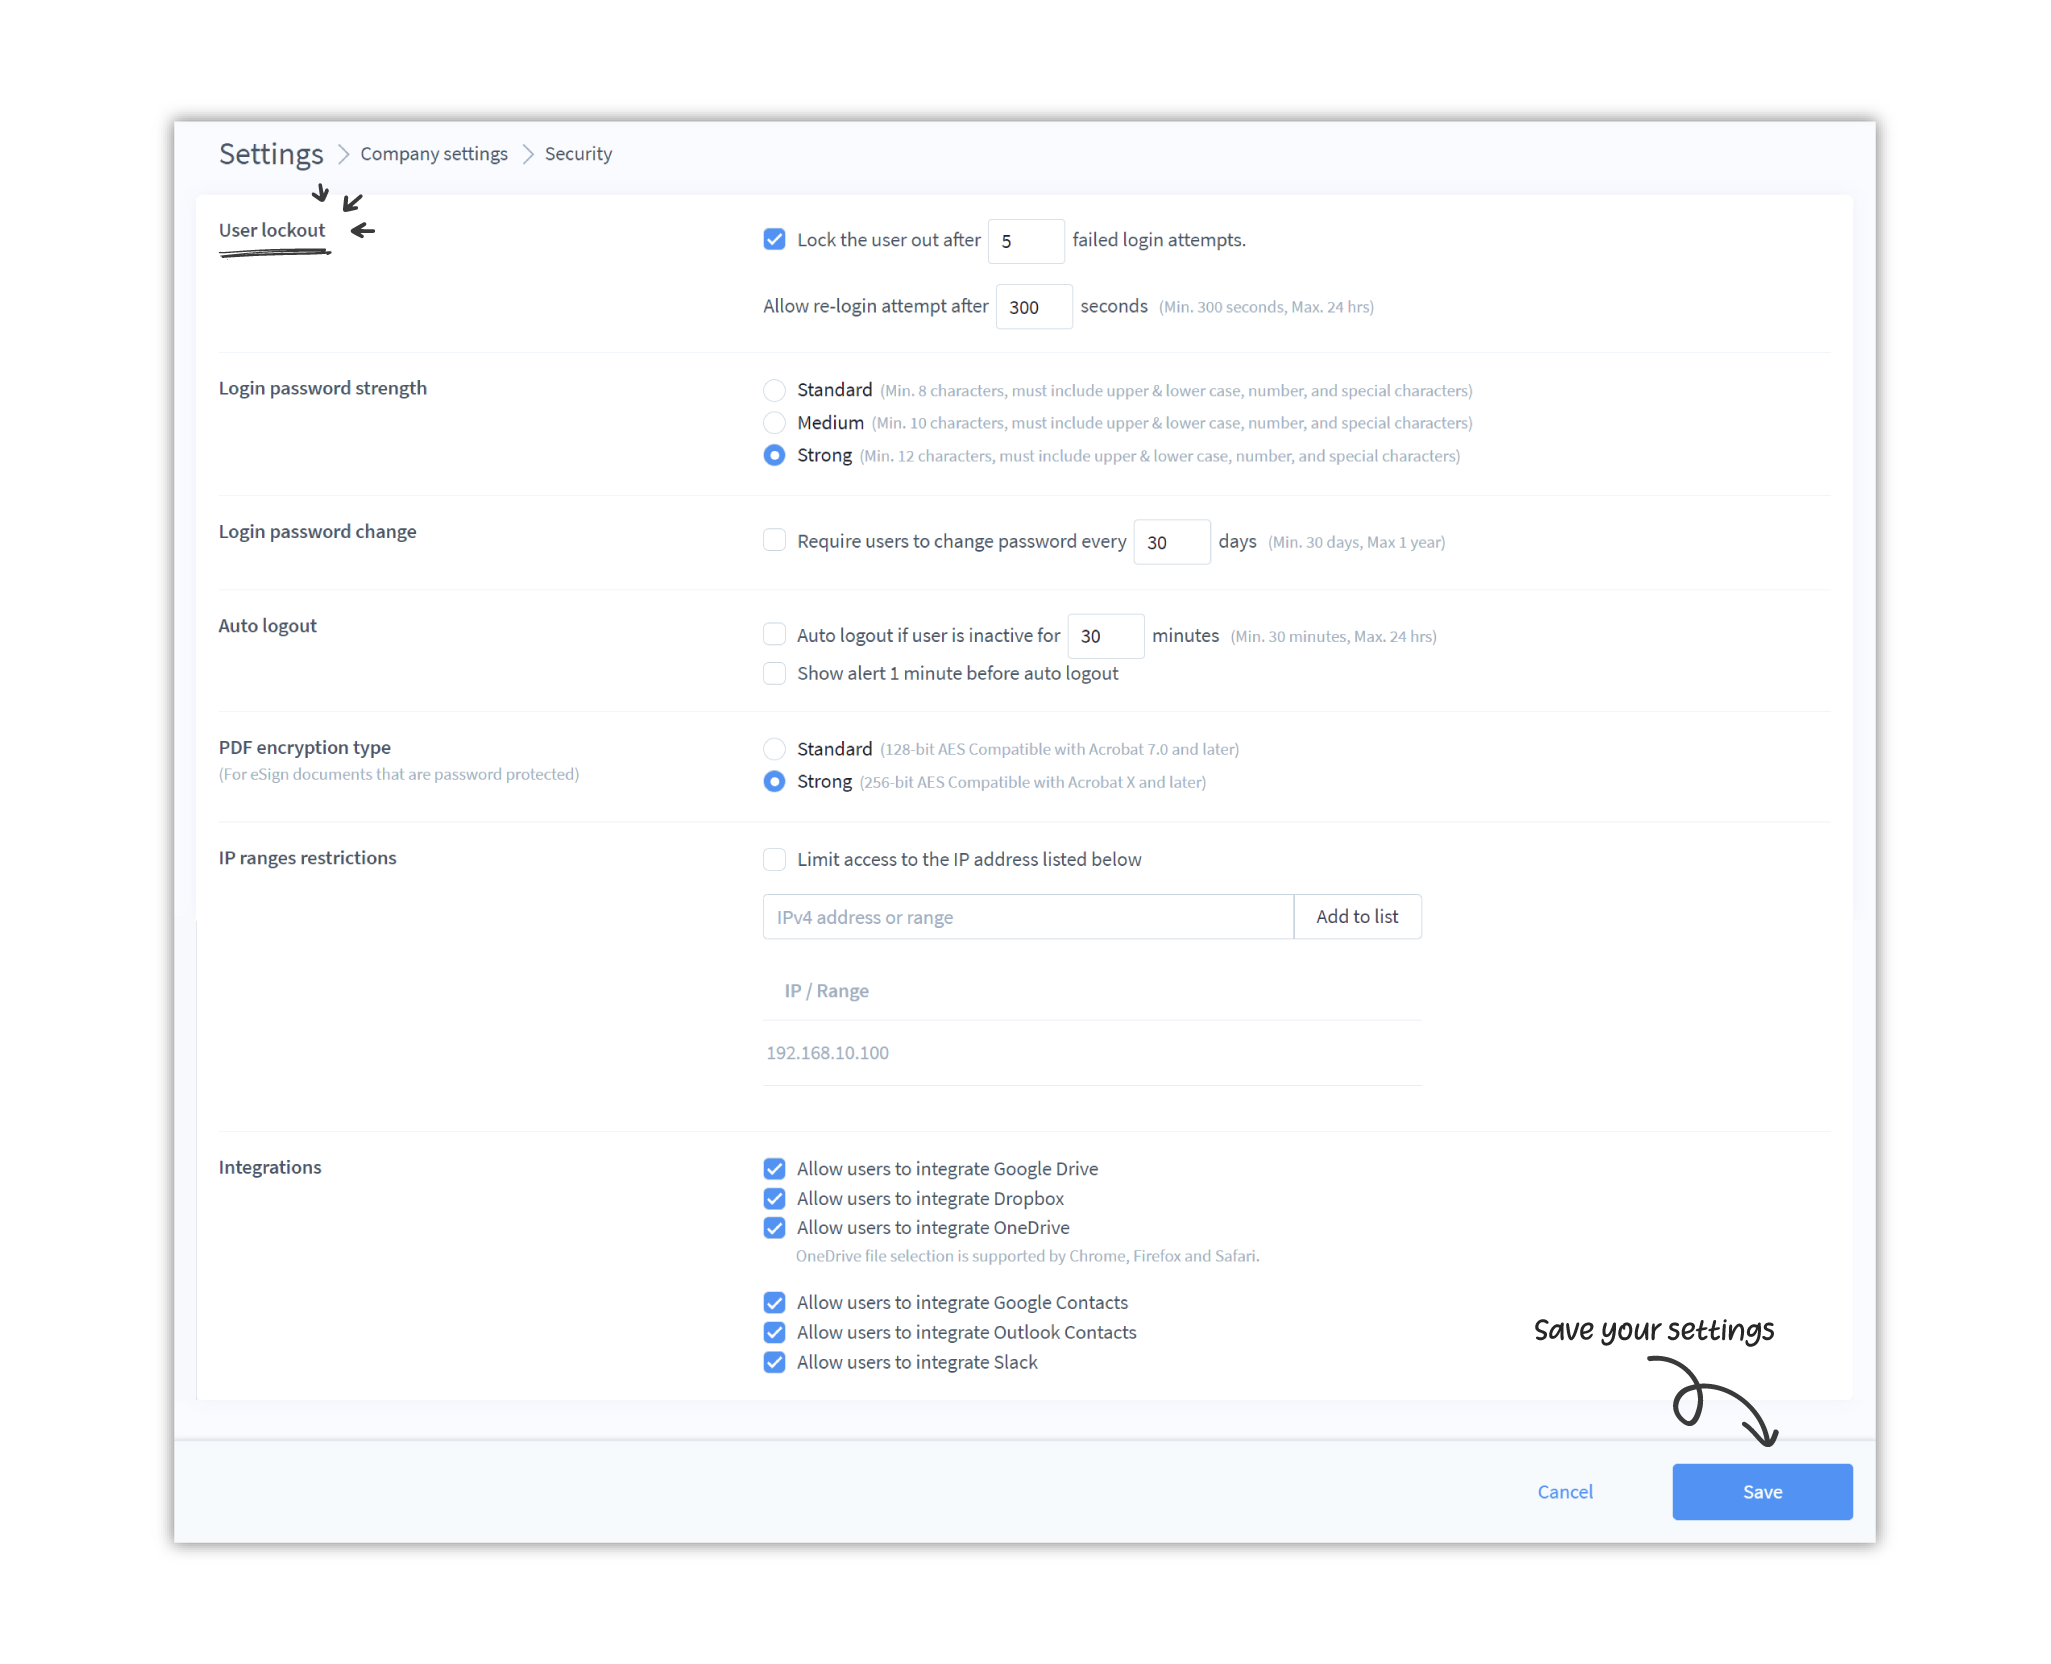
- Set the maximum number of failed attempts allowed after which the user will be locked out.
- Set the duration after which they will be allowed to re-attempt logging in. This should be between 300 seconds (5 minutes) to 24 hours.
- Click on Save.
- You will need to log out and log in again for the changes to take effect.
An email will be sent to the user and all admins if a user is locked out. This feature ensures that if the login attempts were not made by the user, the user can change their password and the unauthorized login attempts can be reported.
To switch off user lock out:
- Click on Settings in the bottom left corner of your DocuX screen.
- Click on Security under Company settings.
- Deselect the check box along side the User Lock Out label. The check box will be white with no checkmark when deselected, indicating the setting is switched off.
- Click on Save.
- You will need to log out and log in again for the changes to take effect.
Login password strength
As an admin, you can enforce reqired login password strengths to protect your users’ accounts and meet your company’s compliance policies.
The default required strength is set to Standard which equates to a password with minimum 8 characters, at least one uppercase and one lowercase alphabet, at least one number, and one symbol/special character.
Medium strength password = a password with minimum 10 characters, at least one uppercase and one lowercase alphabet, at least one number, and one symbol/special character.
Strong strength password = a password with minimum 12 characters, at least one uppercase and one lowercase alphabet, at least one number, and one symbol/special character.
To enforce a company-wide login password strength:
- Click on Settings in the bottom left corner of your DocuX screen.
- Click on Security under Company settings.
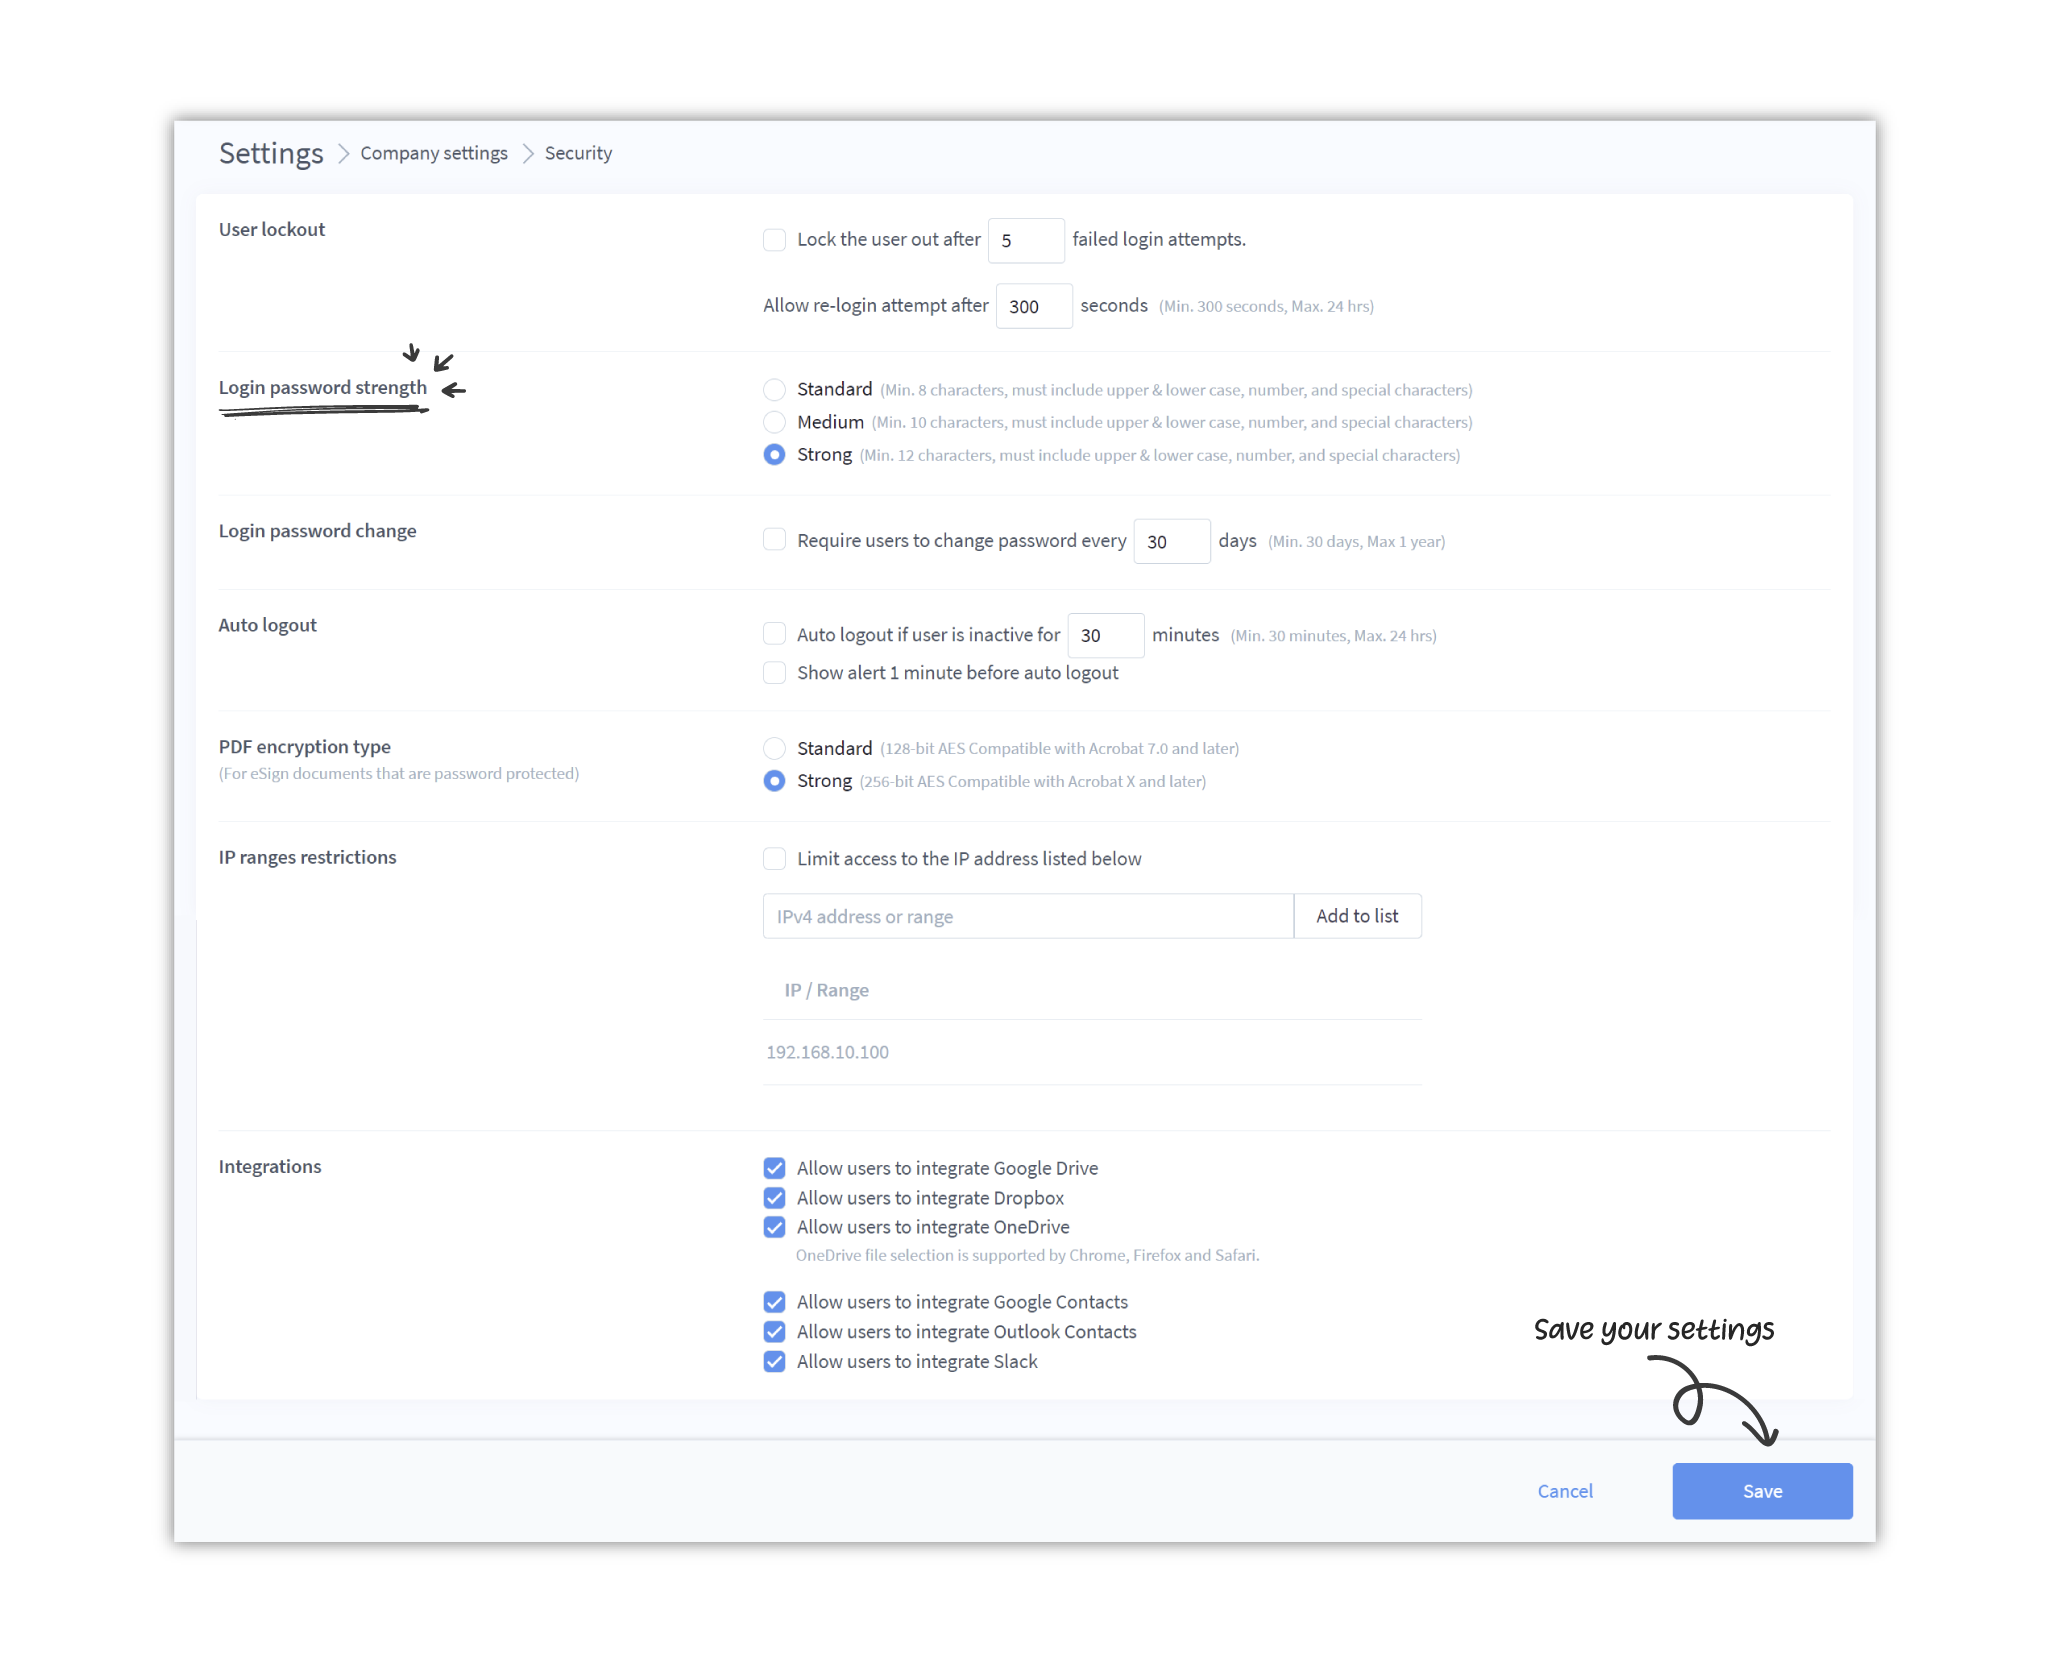
- Select Standard, Medium, or Strong alongside the Login password strength label.
- Click Save.
- You may need to log out and log in again for the change to take effect.
Login password change frequency
As an admin, you can enforce a login password change frequency to protect your users’ accounts and meet your company’s compliance requirements.
You can choose a duration between 30 days and 1 year and users will need to create and set a new password for their account each time that duration elapses.
To set the login password change frequency:
- Click on Settings in the bottom left corner of your DocuX screen.
- Click on Security under Company settings.
- Select the checkbox along side the Login password change label. The check box will be blue when selected, indicating the setting is switched on.
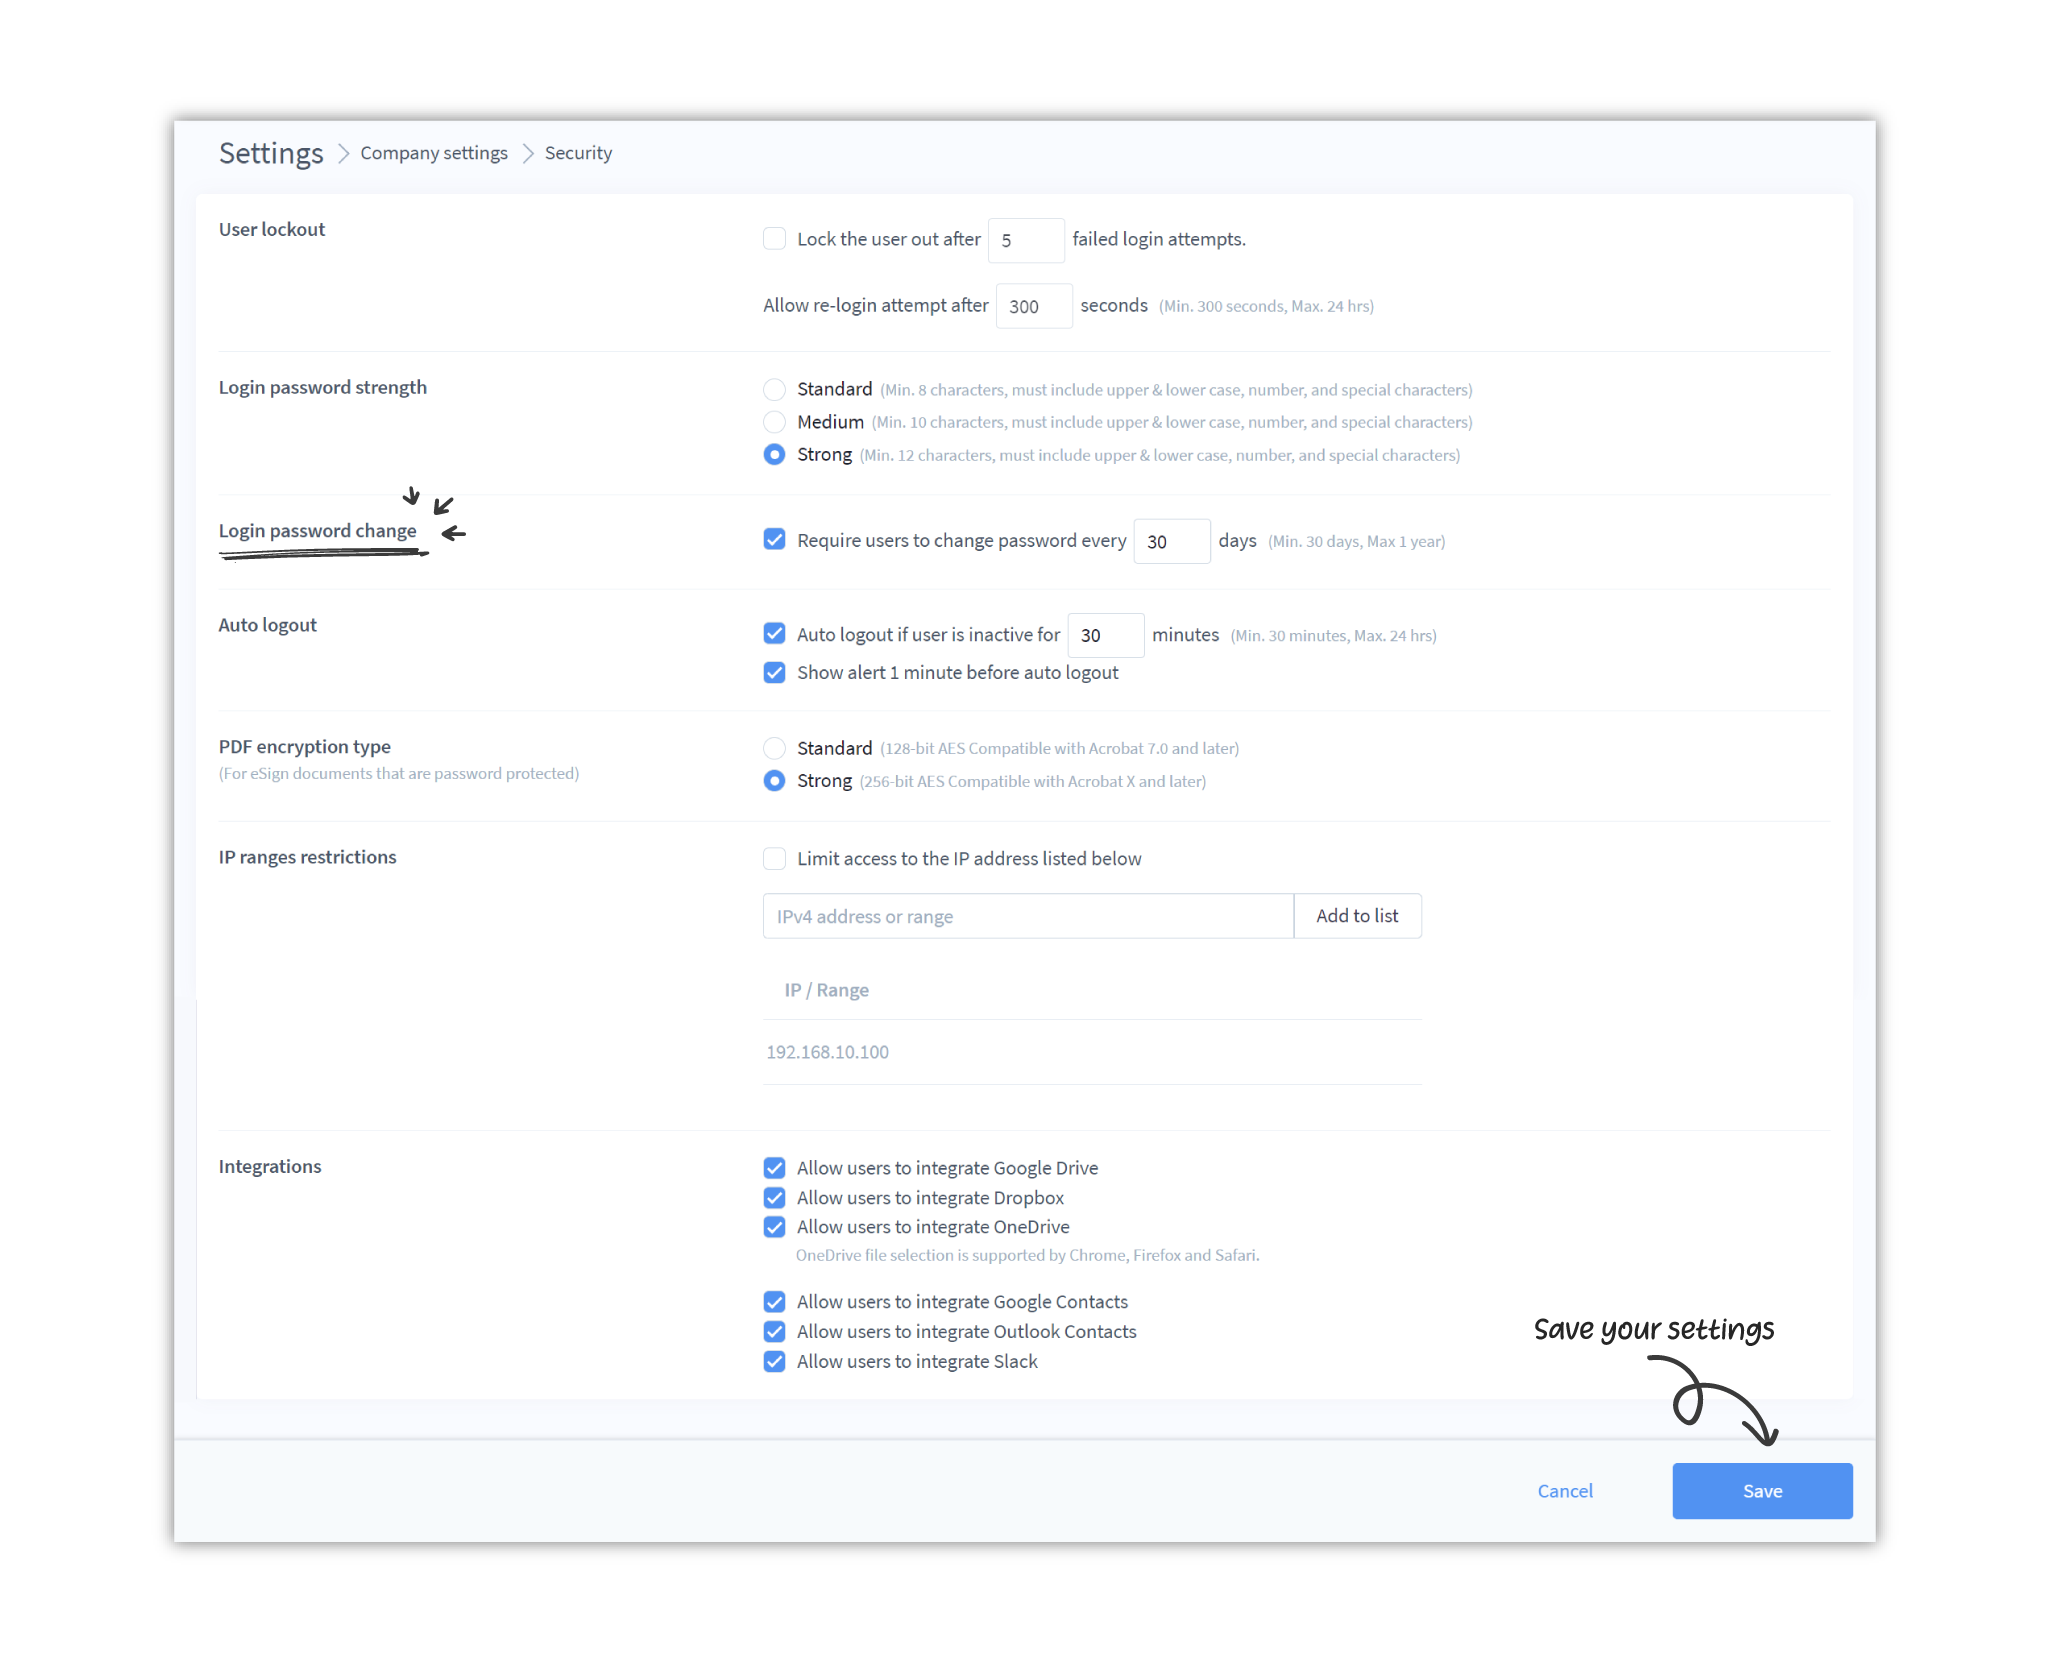
- Add the duration after which users will be required to change their passwords in the box provided. The duration should be between 30 days and 1 year.
- Click Save.
- You may need to log out and log in again for the change to take effect.
Auto logout
Auto logout is a security measure to prevent unauthorized access and ensure compliance with your company’s security policies.
If switched on, logged in users who have been inactive on the platform for a certain duration of time will be automatically logged out.
DocuX regularly and automatically saves changes to documents, so there is no risk of users’ progress being lost in case of an auto logout.
To switch on auto logout:
- Click on Settings in the bottom left corner of your DocuX screen.
- Click on Security under Company settings.
- Select the checkbox along side the Auto logout label. The check box will be blue when selected, indicating the setting is switched on.
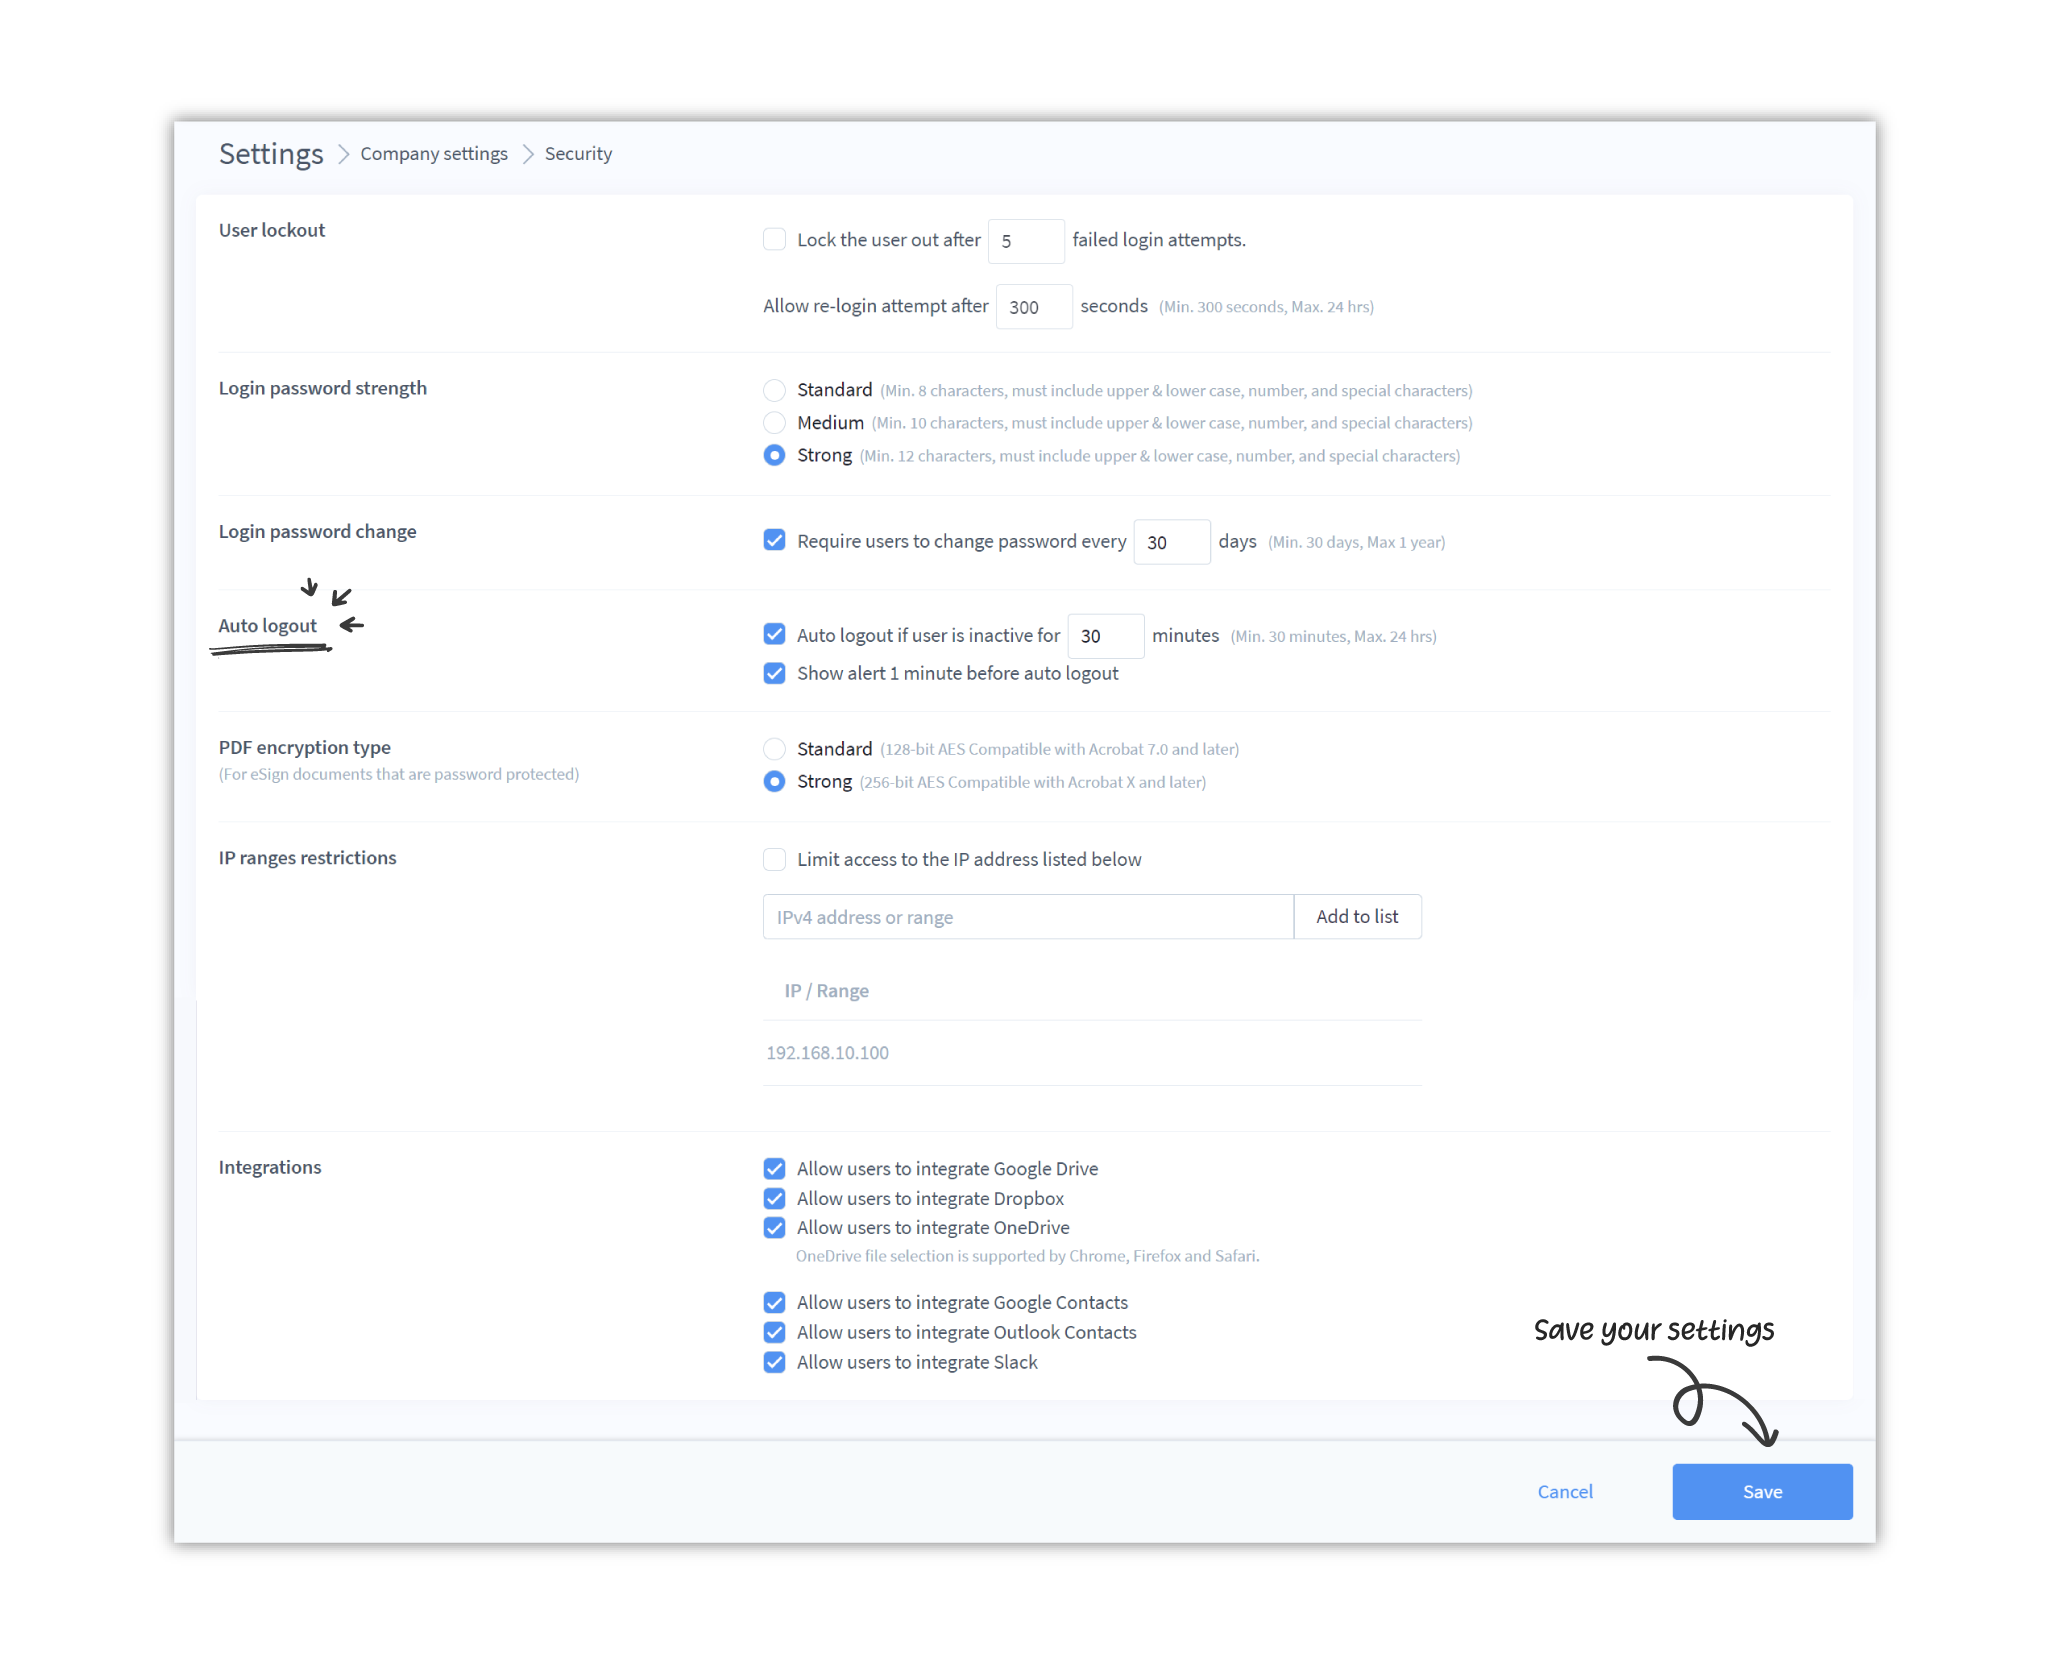
- Add the duration after which inactive users will be automatically logged out in the box provided. The duration should be between 30 minutes and 24 hours
- Click on Save.
- You may need to log out and log in again for the change to take effect.
To switch off auto logout:
- Click on Settings in the bottom left corner of your DocuX screen.
- Click on Security under Company settings.
- Deselect the checkboxes alongside the Auto Logout label. The checkboxes will be white when deselected, indicating the setting is switched off.
- Click on Save.
- You may need to log out and log in again for the change to take effect.
PDF encryption type
Users can password protect eSign documents on DocuX. This ensures that only recipients authorized to view the document can do so.
The admin can choose the strength of PDF encryption that should be applied to these password protected eSign PDFs.
To set the PDF encryption type:
- Click on Settings in the bottom left corner of your DocuX screen.
- Click on Security under Company settings.
- Select Standard or Strong based on your compliance needs.
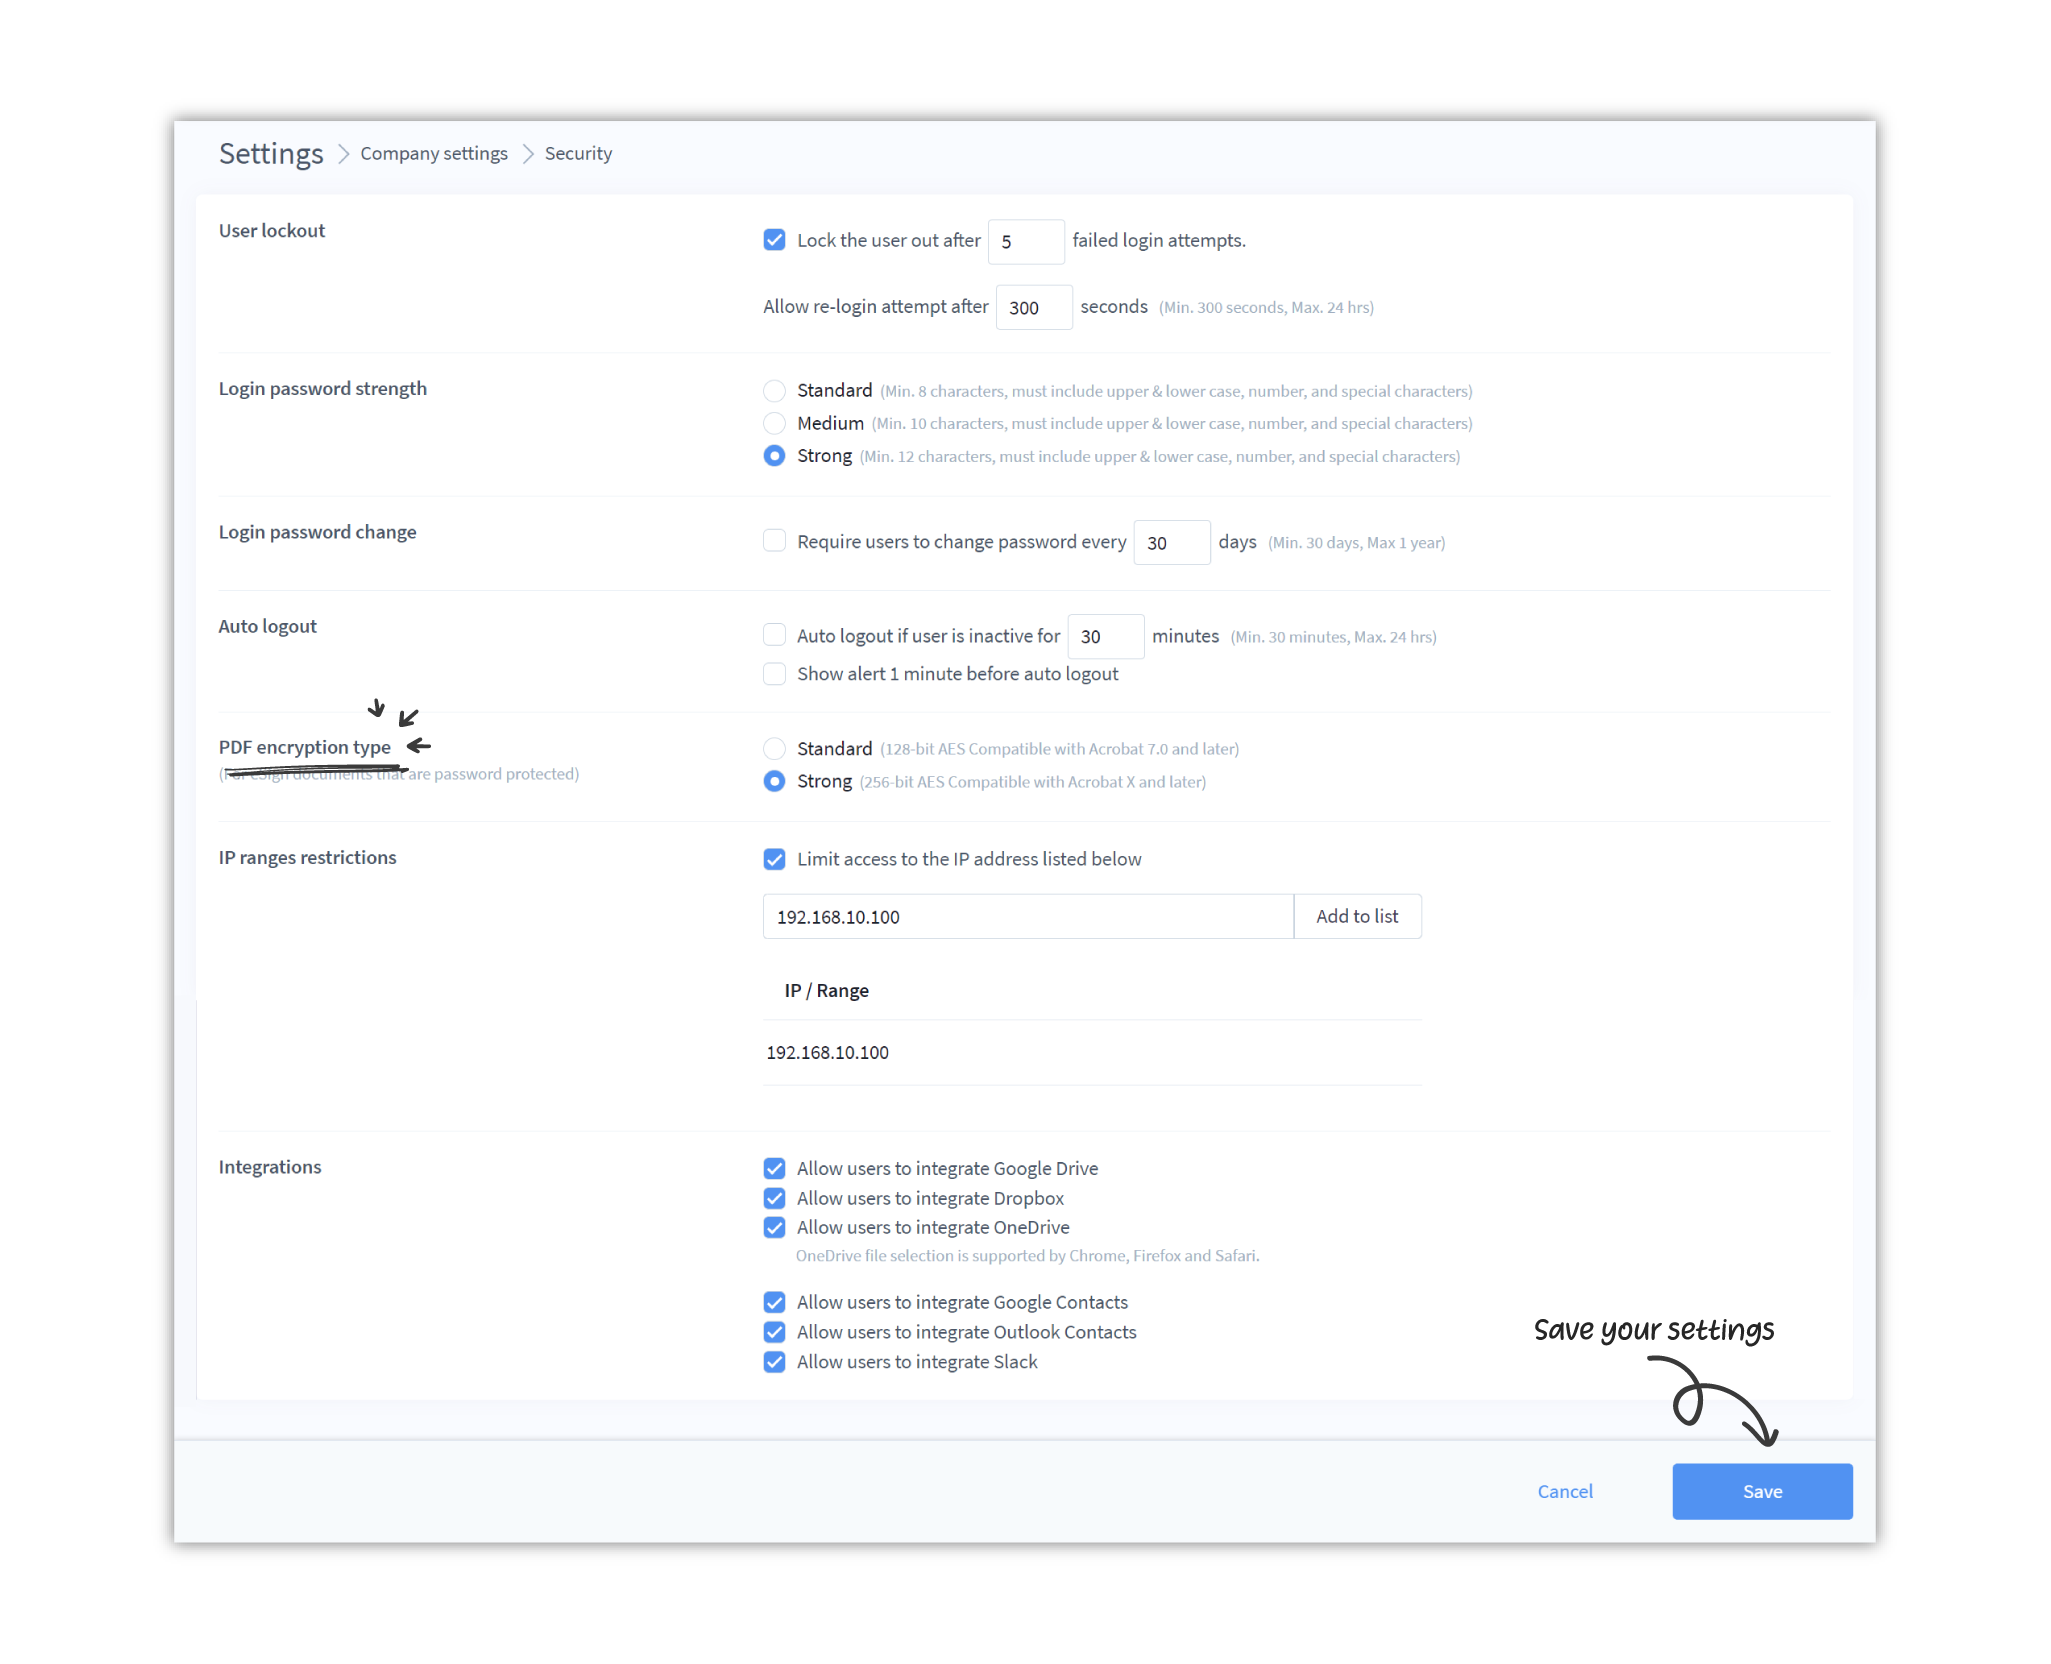
- Standard = 128-bit AES. Compatible with Acrobat 7.0 and later.
- Strong = 256-bit AES. Compatible with Acrobat X and later.
- Click Save.
- You will need to log out and log in again for the changes to take effect.
IP ranges restriction
You can restrict internal users and external collaborators to a specific IP address or a range of IP addresses. If enabled, only users trying to access from those IP addresses will be able to log into their company DocuX account.
This is a security measure to ensure the company’s documents can only be accessed while at certain locations.
Accepted input formats for IP ranges:
- 192.168.0.0
- 192.168.0.0/255.255.255.0
- 192.168.0.10 - 192.168.10.20
- 192.168.10.10-20
- 192.168.10.0/24
To switch on IP ranges restriction:
- Click on Settings in the bottom left corner of your DocuX screen.
- Click on Security under Company settings.
- Select the checkbox alongside IP Ranges restriction.

- Add the IPv4 address or range of addresses that you want to allow access from.
- Click on Add to list.
- Click on Save.
- You will need to log out and log in again for the changes to take effect.
To switch off IP ranges restriction:
- Click on Settings in the bottom left corner of your DocuX screen.
- Click on Security under Company settings.
- Deselect the checkbox alongside IP Ranges restriction.
- Click on Save.
- You will need to log out and log in again for the changes to take effect.
- All your users can now log in to their company DocuX account irrespective of location and IP address.
Integrations
DocuX makes it easy for users to integrate other commonly used tools and services with their DocuX accounts. This helps them import and export documents, contacts, and other data with ease.
As an admin, you can decide which integrations to make available for your DocuX users. View all available integrations.
To block specific integrations for your users:
- Click on Settings in the bottom left corner of your DocuX screen.
- Click on Security under Company settings.
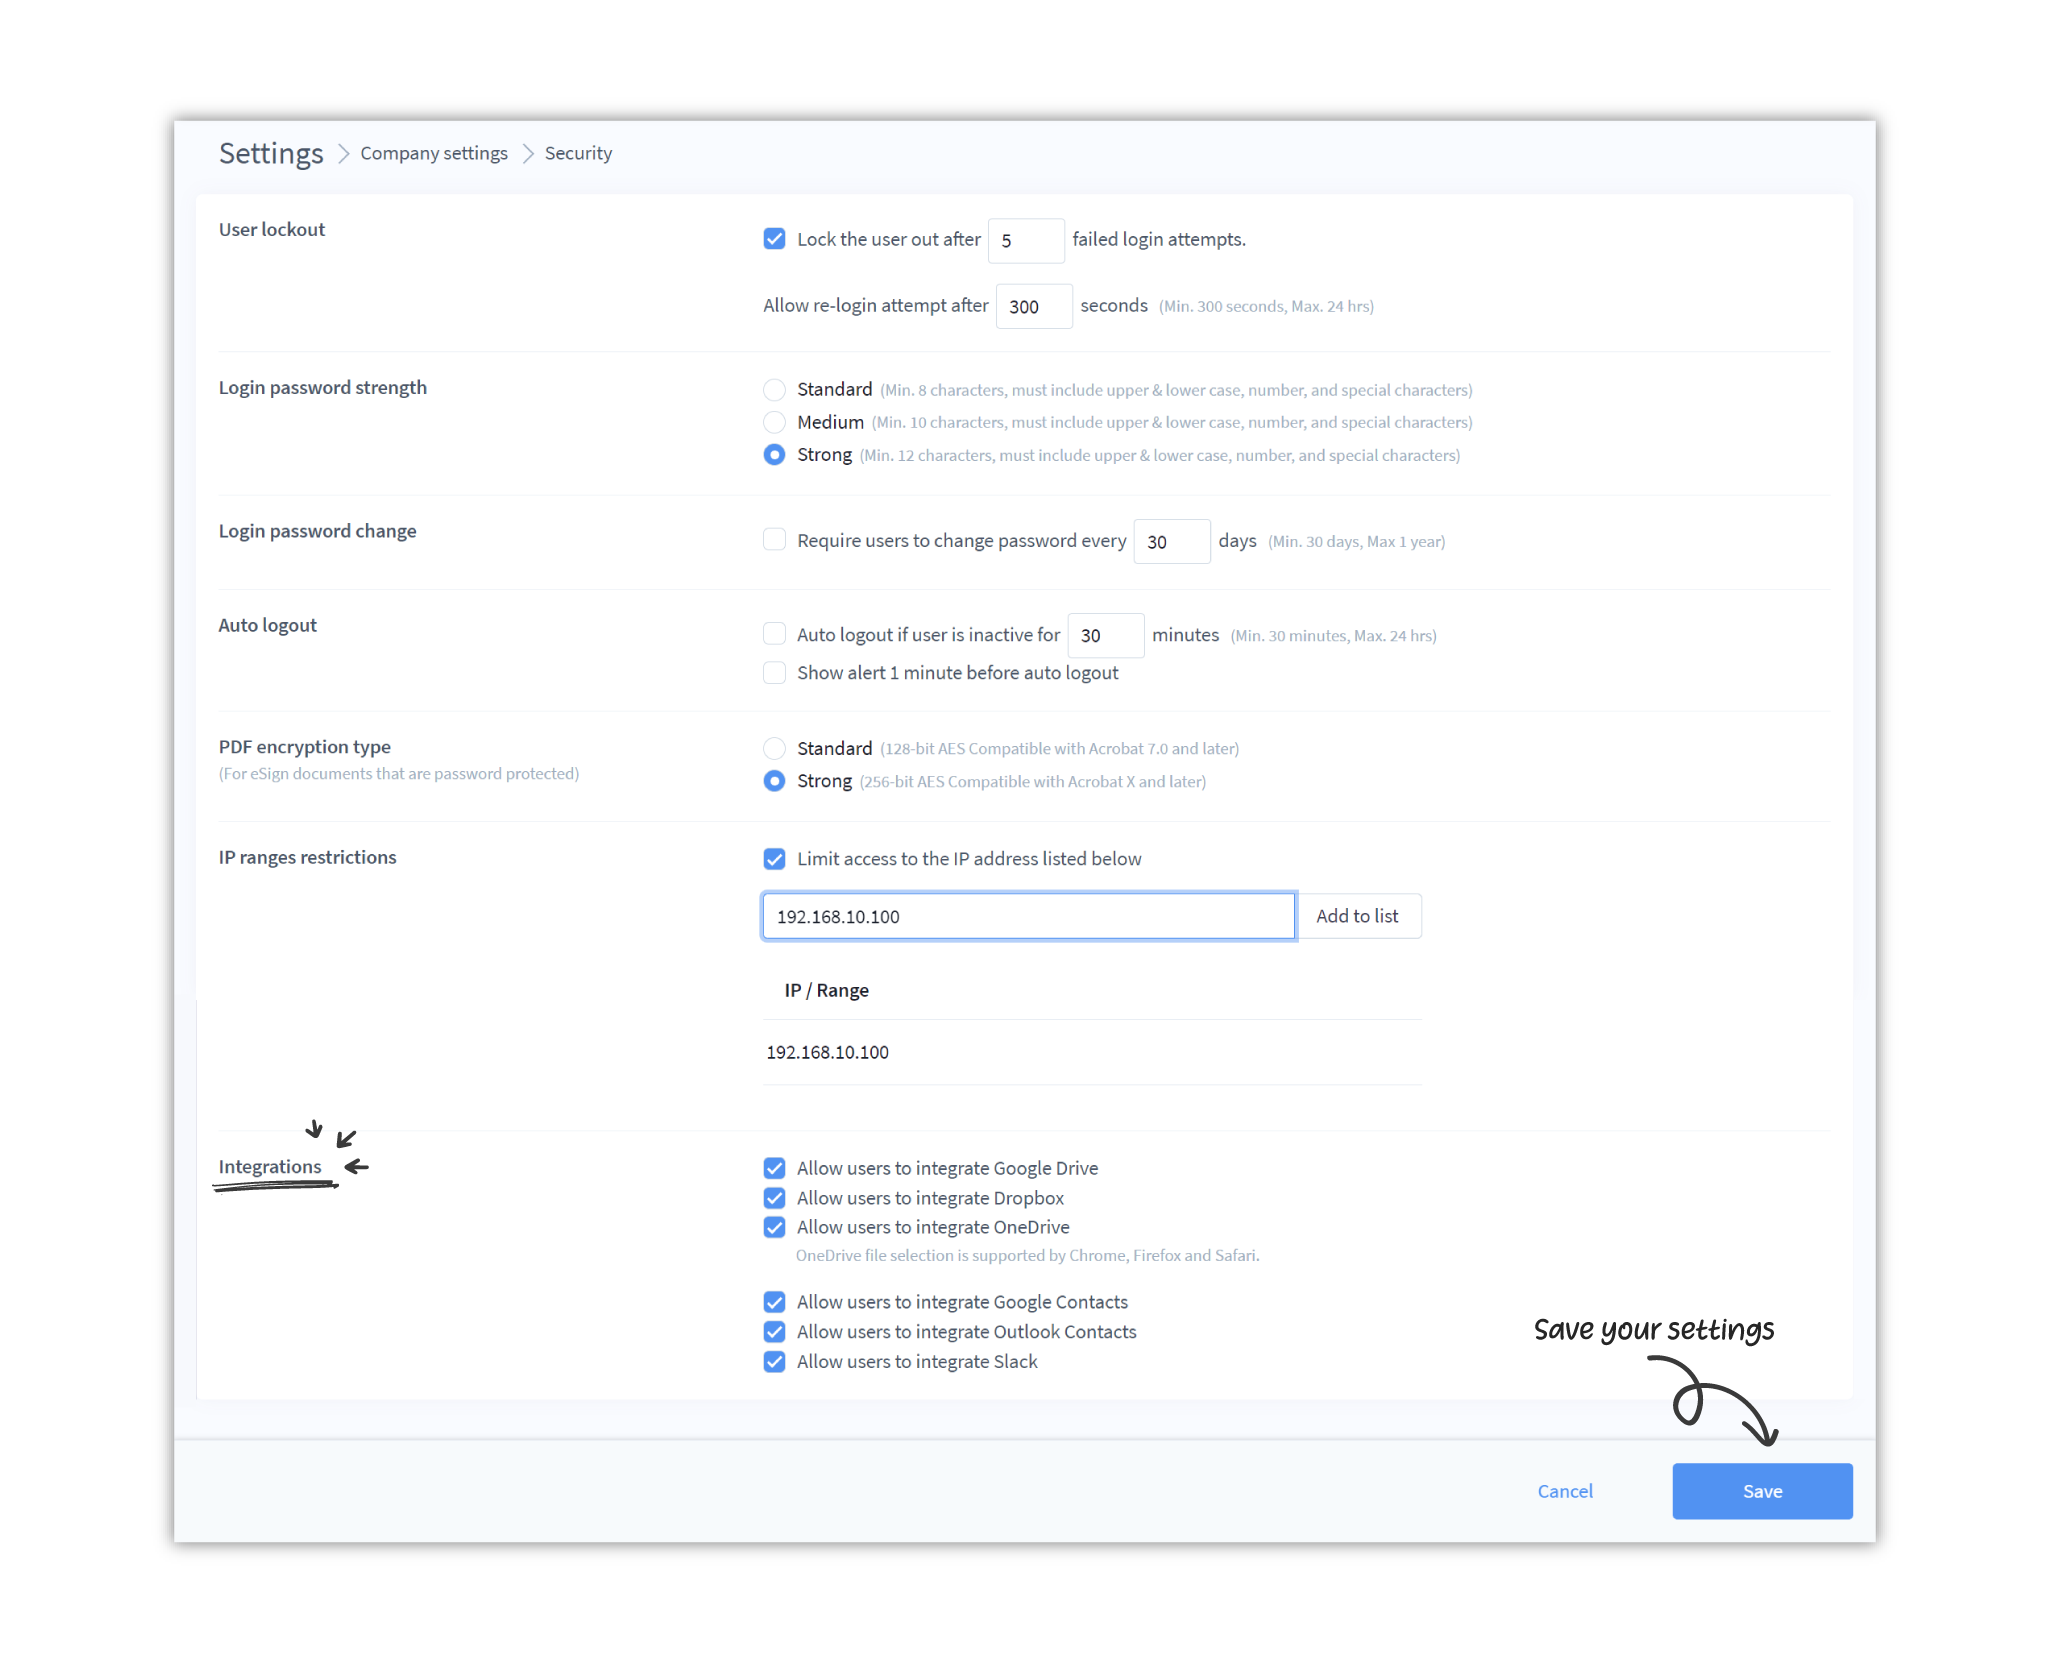
- Deselect the checkboxes alongside the Integrations label for the integrations you don’t want users to access.
- Click Save.
- You will need to log out and log in again for the changes to take effect.