Set up your account
A quick guide to help you set up your account on DocuX. We’ll cover how you can:
- Sign up on the platform.
- Use your free trial.
- Add contacts and team members.
- Change security settings, and.
- Upgrade to higher plans if you want to.
Sign up on DocuX
Signing up on DocuX is fast and easy.
Go to the DocuX website and click on the Get started free button in the top-right corner or click on this link: https://app.docux.ai/signup.
This form should open up:
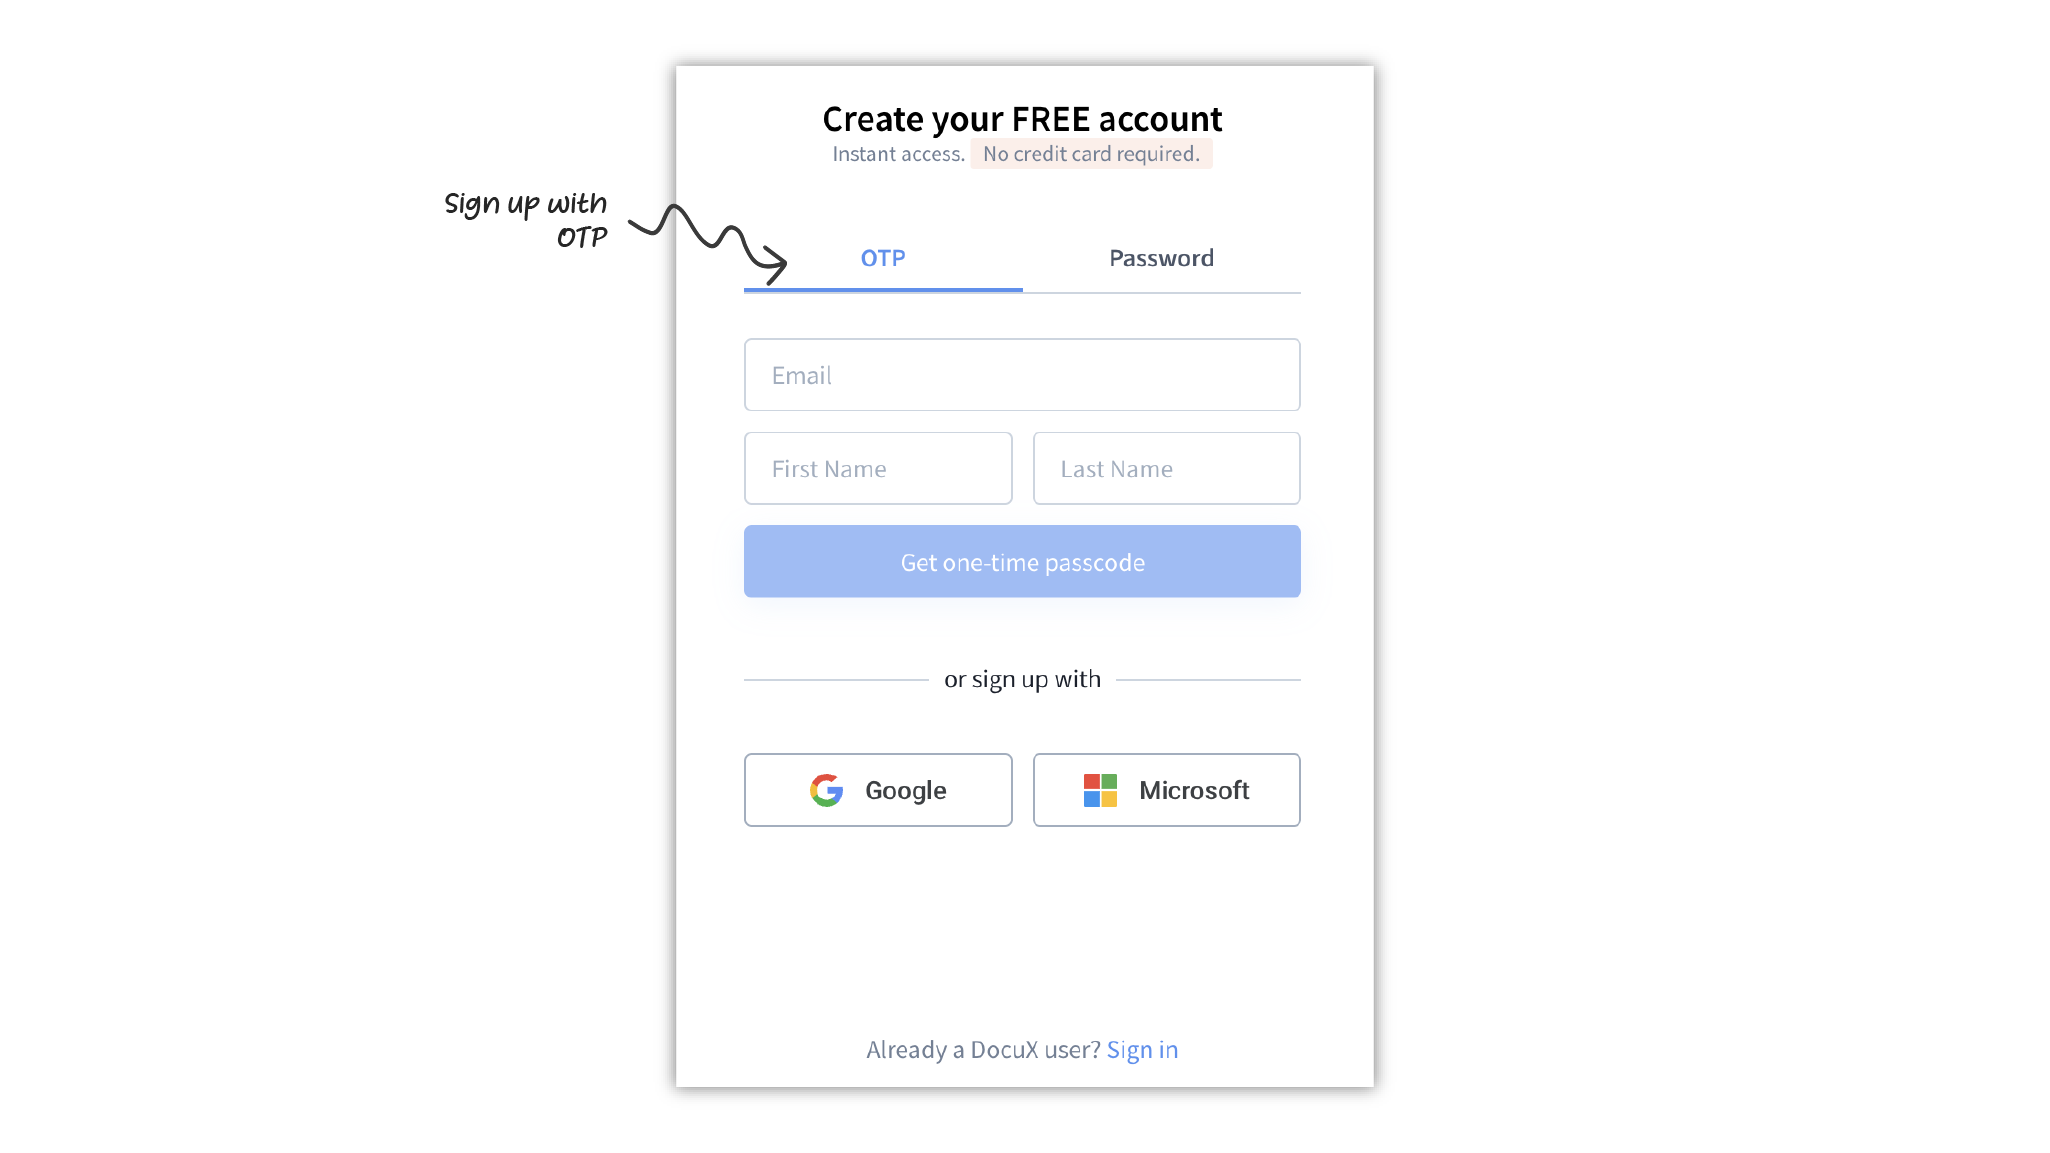
You can choose to sign up using any of the following methods:
- OTP or One-Time Passcode: A 6-digit passcode will be sent to your email. Enter the passcode in the form and sign up.
- Password: Use an email and password to sign up. You will need to verify your email.
- Google: Directly sign up with your Google account.
- Microsoft: Directly sign up with your Microsoft account.
Start using your free trial
All new accounts on DocuX are offered a 90-day free trial across all our plans.
DocuX’s free trial has no limits and you can use each plan with all of its included features during the trial period.
Signing up is easy, needs no payment info and you can get started right away. You will be on the Personal plan by default—which is our free-for-life plan and can claim the free trial of any of our paid plans as shown below.
This is an introductory offer and may be paused or cancelled in the future.
To upgrade to a 90-day free trial of the Pro, Team, or Enterprise plans:
- Click on Settings at the bottom-left corner of the DocuX menu.
- Click first on Plans & Invoicing, then on Manage.
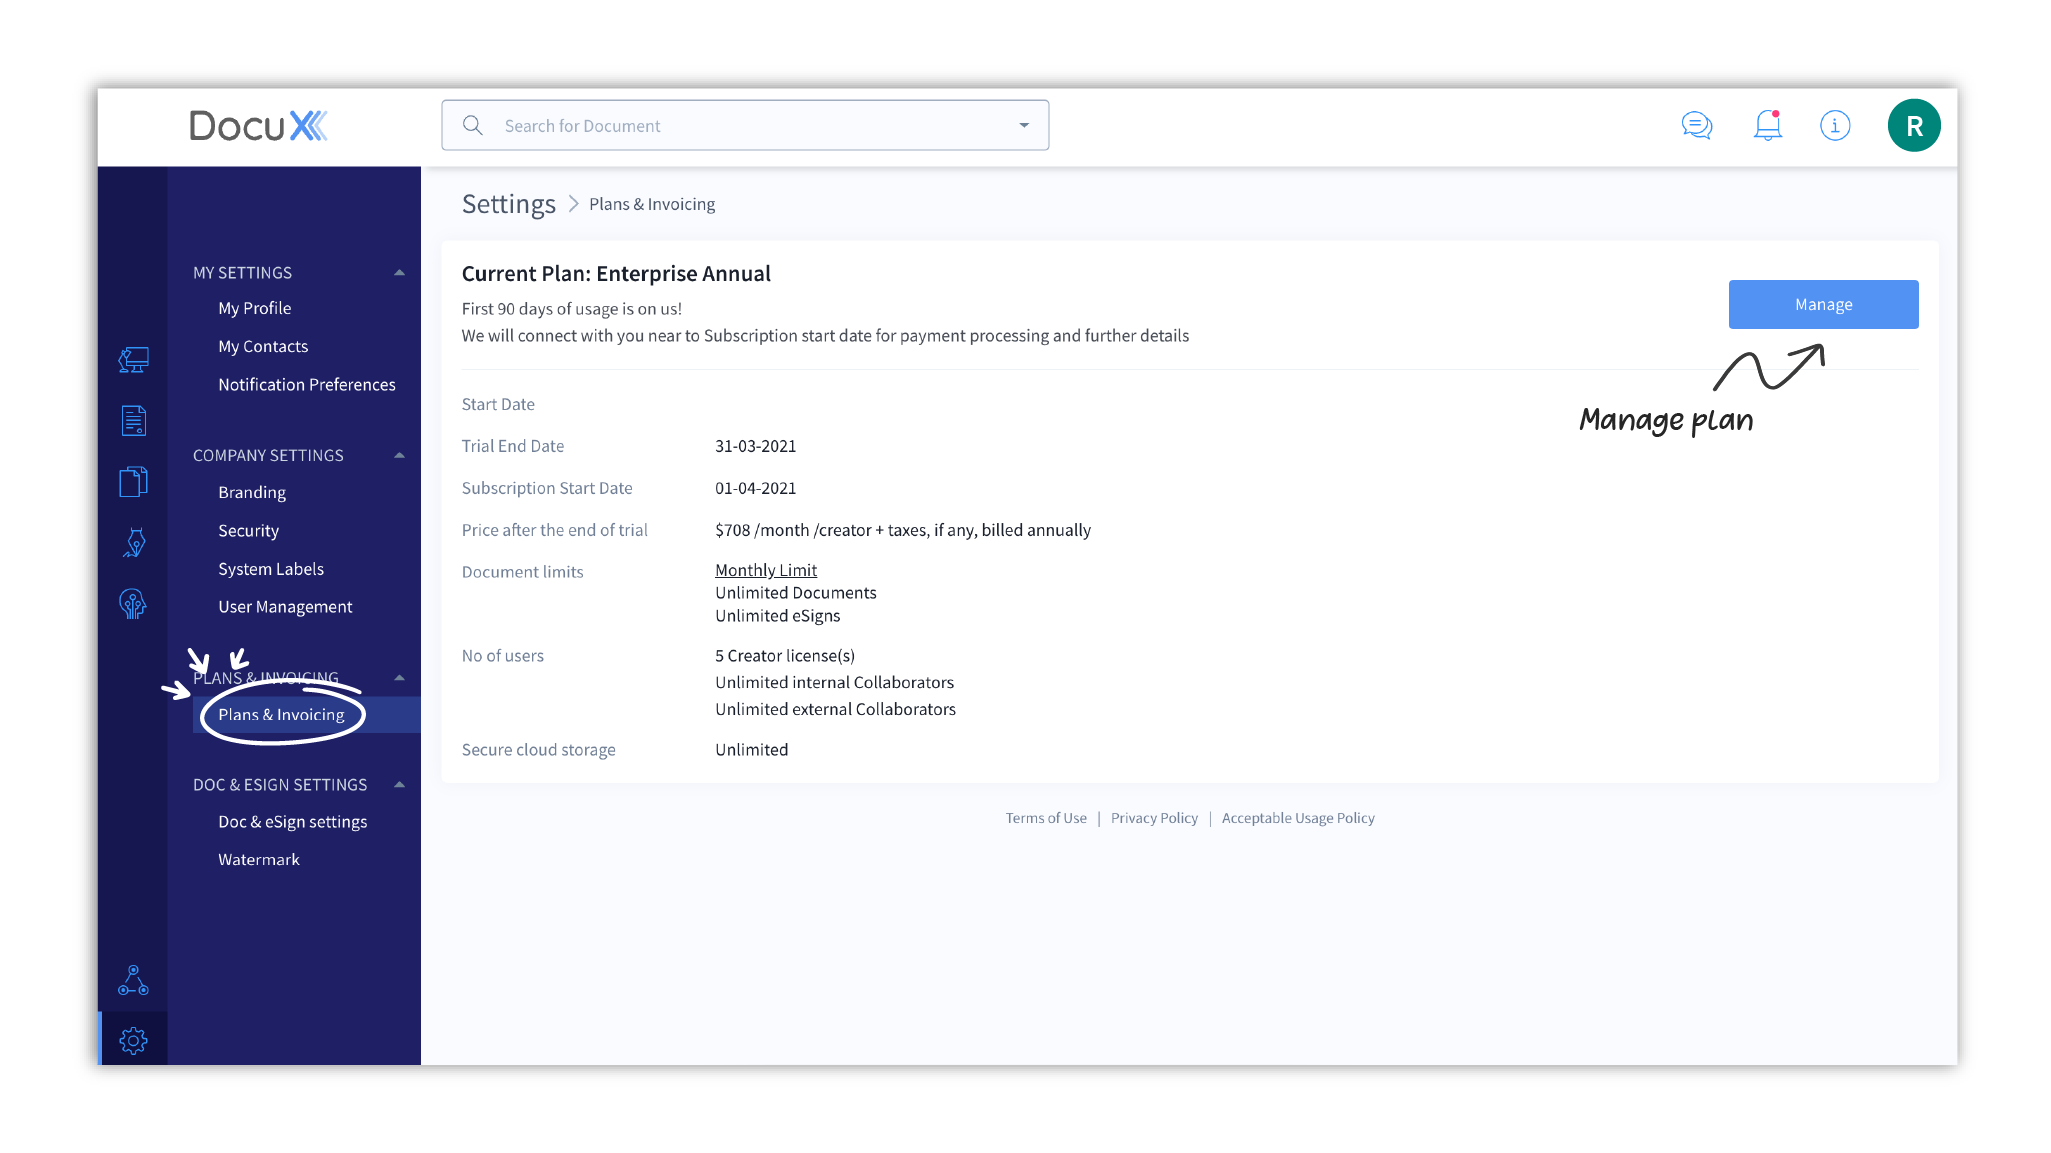
- Select the plan you wish to upgrade to for the duration of the trial.
- Choose the number of creator licenses and billing frequency.
- Click on Confirm. Your new plan is now active.
- You cannot downgrade from a team plan (Team, Enterprise) to an individual plan (Personal, Pro) because users and data are managed differently for both.
- If you signed up via an invitation from your company, the free trial and its inclusions do not apply to you. Your access to DocuX features will depend on the subscription your company is on and the role they have assigned to you.
Set up your profile
Now that you have signed up and claimed your free trial, let’s set up your profile. Your profile can be accessed in two ways:
Click on Settings at the bottom-left of the DocuX menu. This will open up the My profile tab by default.
OR
Click on your profile icon in the top right corner of the DocuX platform. Then click on My settings.
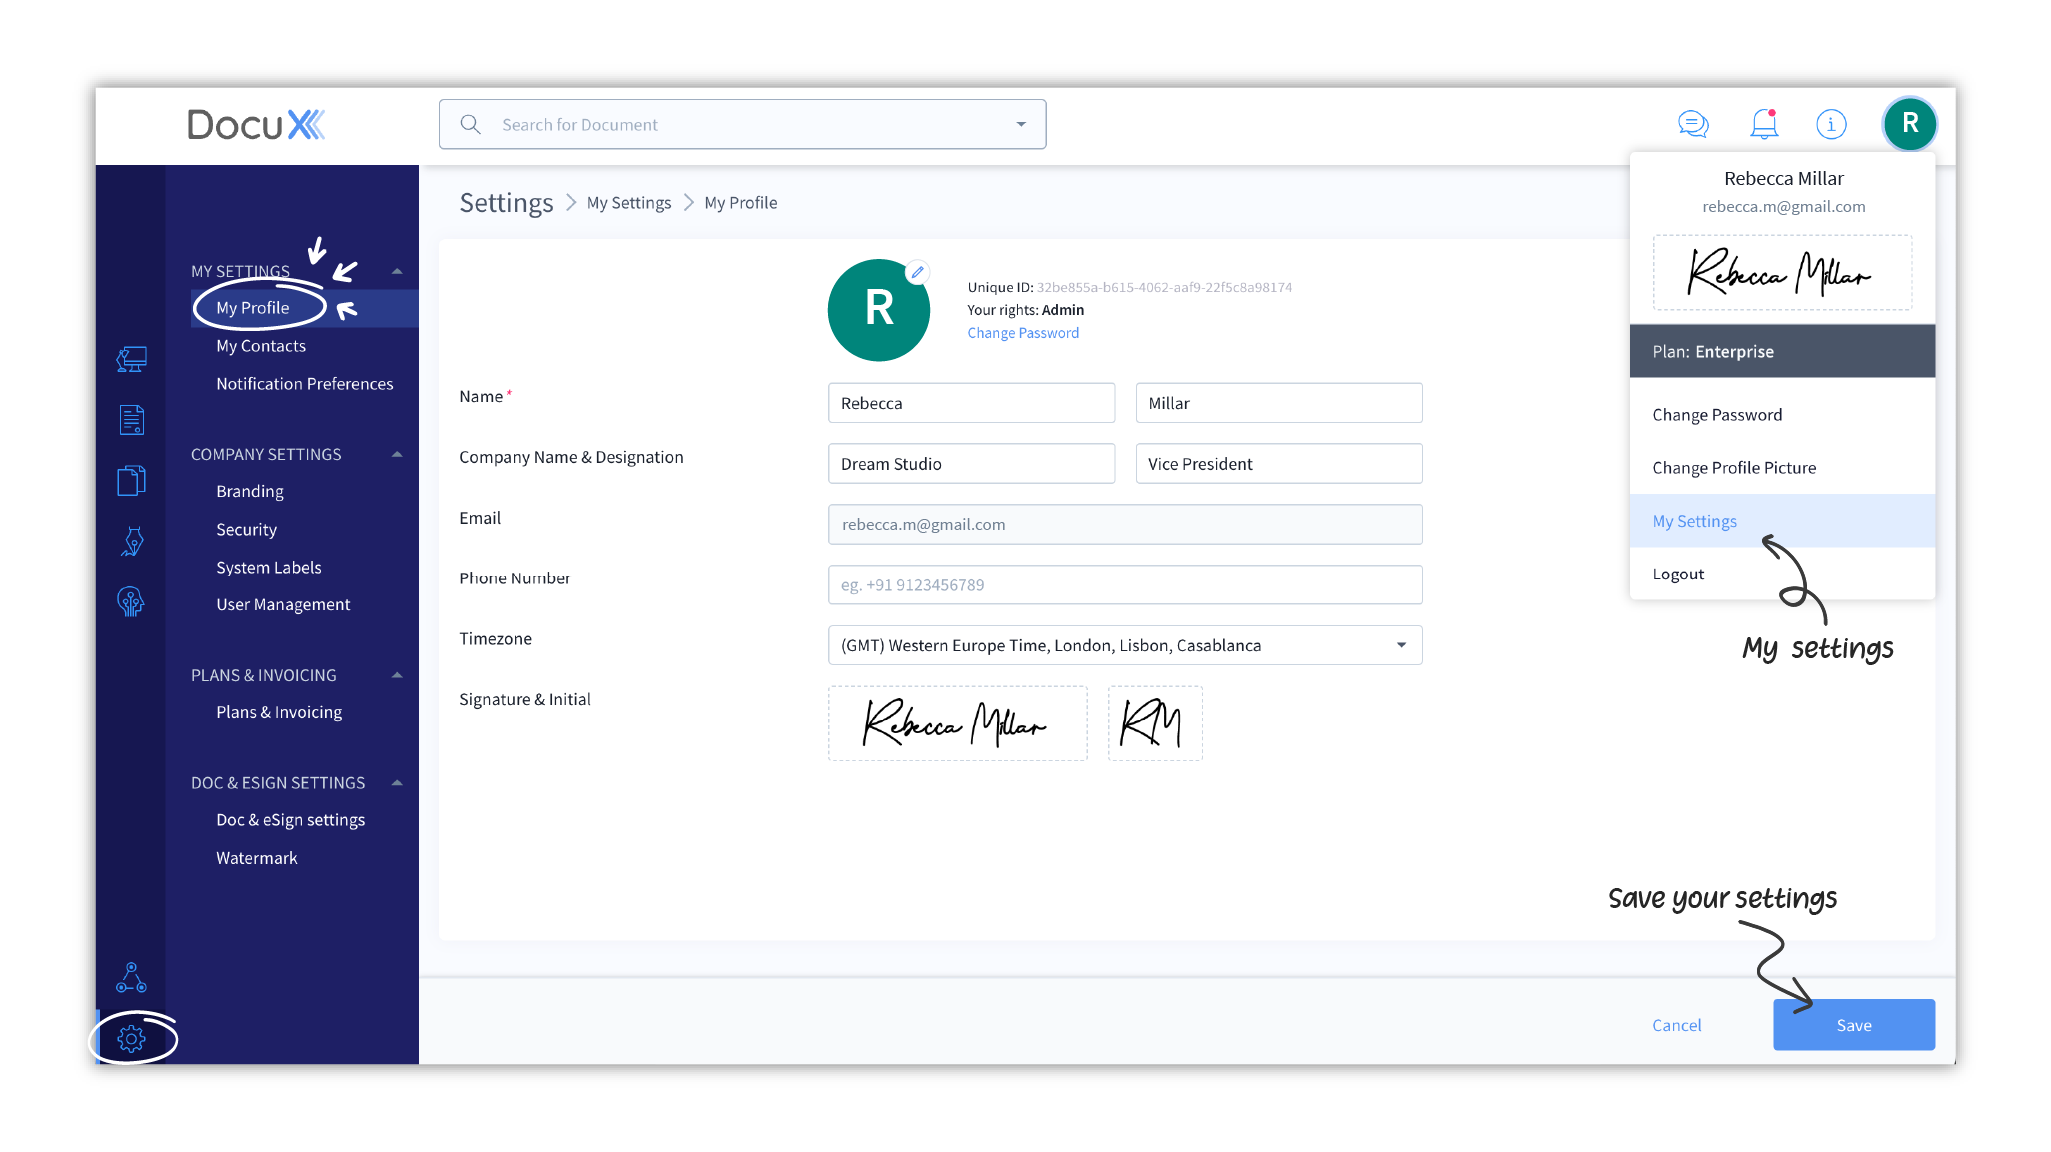
You can edit and add your name, company name and designation, phone number, timezone, signature, and initials in your profile settings.
Once you are done editing, click on Save. You may need to log out and log in again for some changes to take effect.
- Emails are not editable on DocuX. Your email address is irrevocably linked to your DocuX account.
- If you are using DocuX’s font-based automated signature and initials, changing your name will change the signature and initials as well.
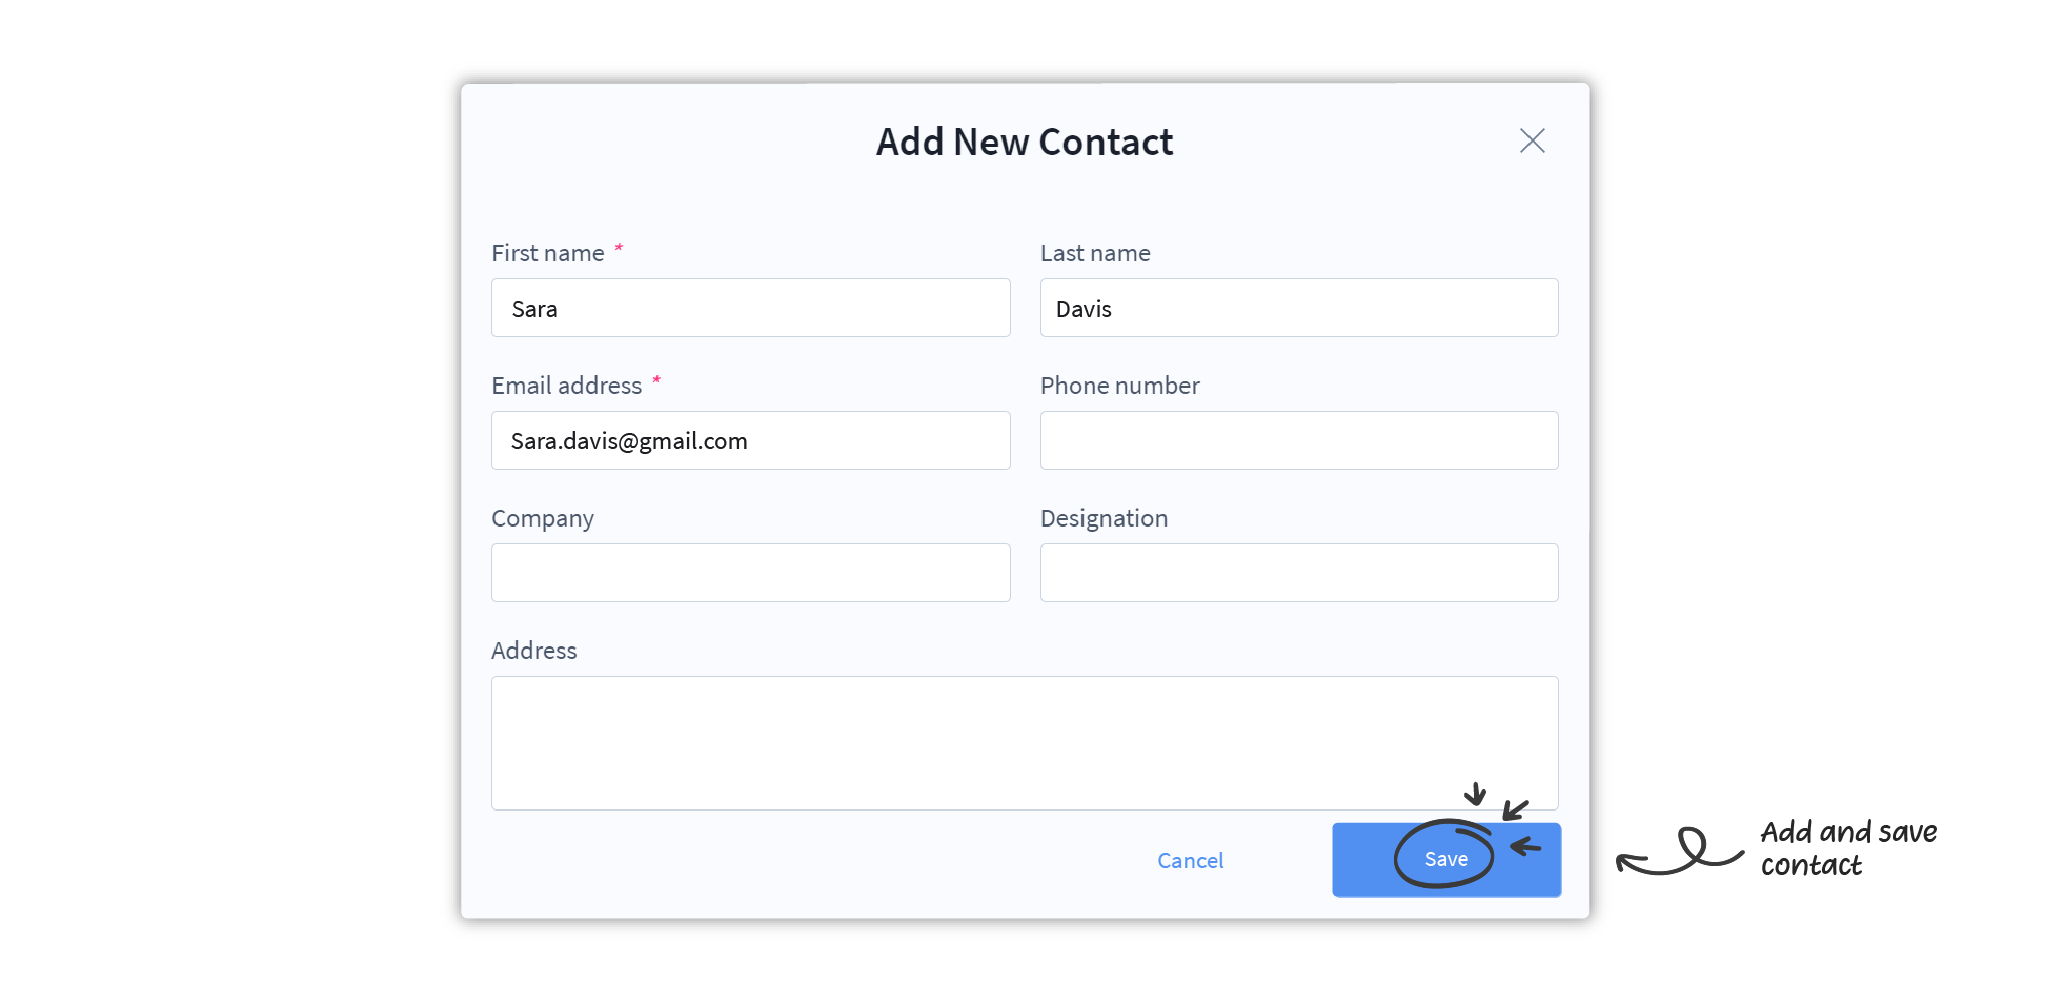
Add contacts
Next up, let’s add some contacts. This will make it easier for you to invite them to collaborate on your documents and esign contracts and agreements.
To add contacts:
- Click on Settings at the bottom-left of the DocuX menu.
- Click on My Contacts under My settings.
- To add contacts in bulk, click on Import From and choose a source to import the contacts from.
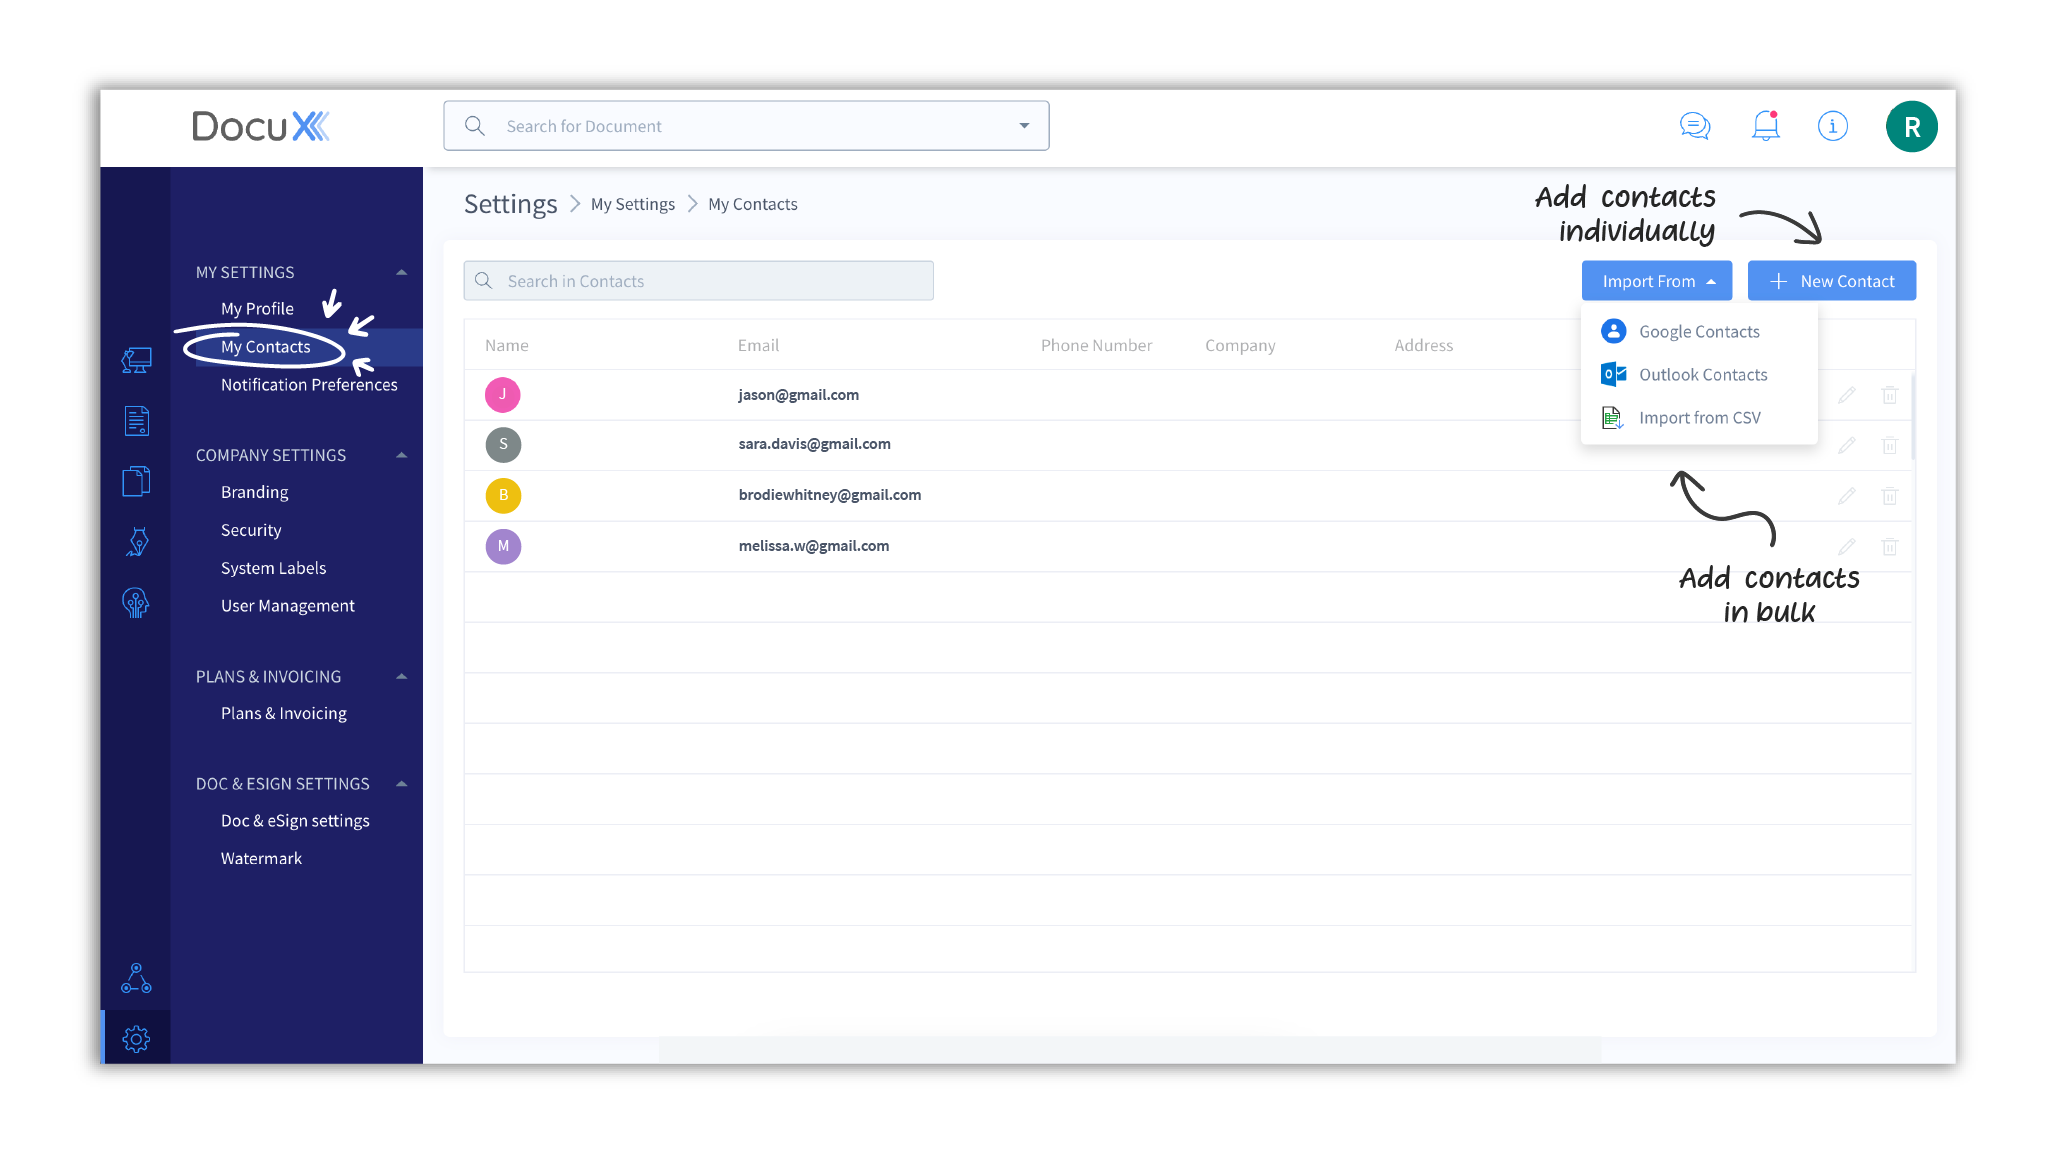
- To add contacts individually, click on + New Contact and fill in the details. Click Save.
Add team members
This section is for Team and Enterprise accounts.
If you have upgraded to Team or Enterprise, you can choose to add your team members to DocuX now.
To add team members
- Click on Settings at the bottom-left of the DocuX menu.
- Click on User Management under Company settings.
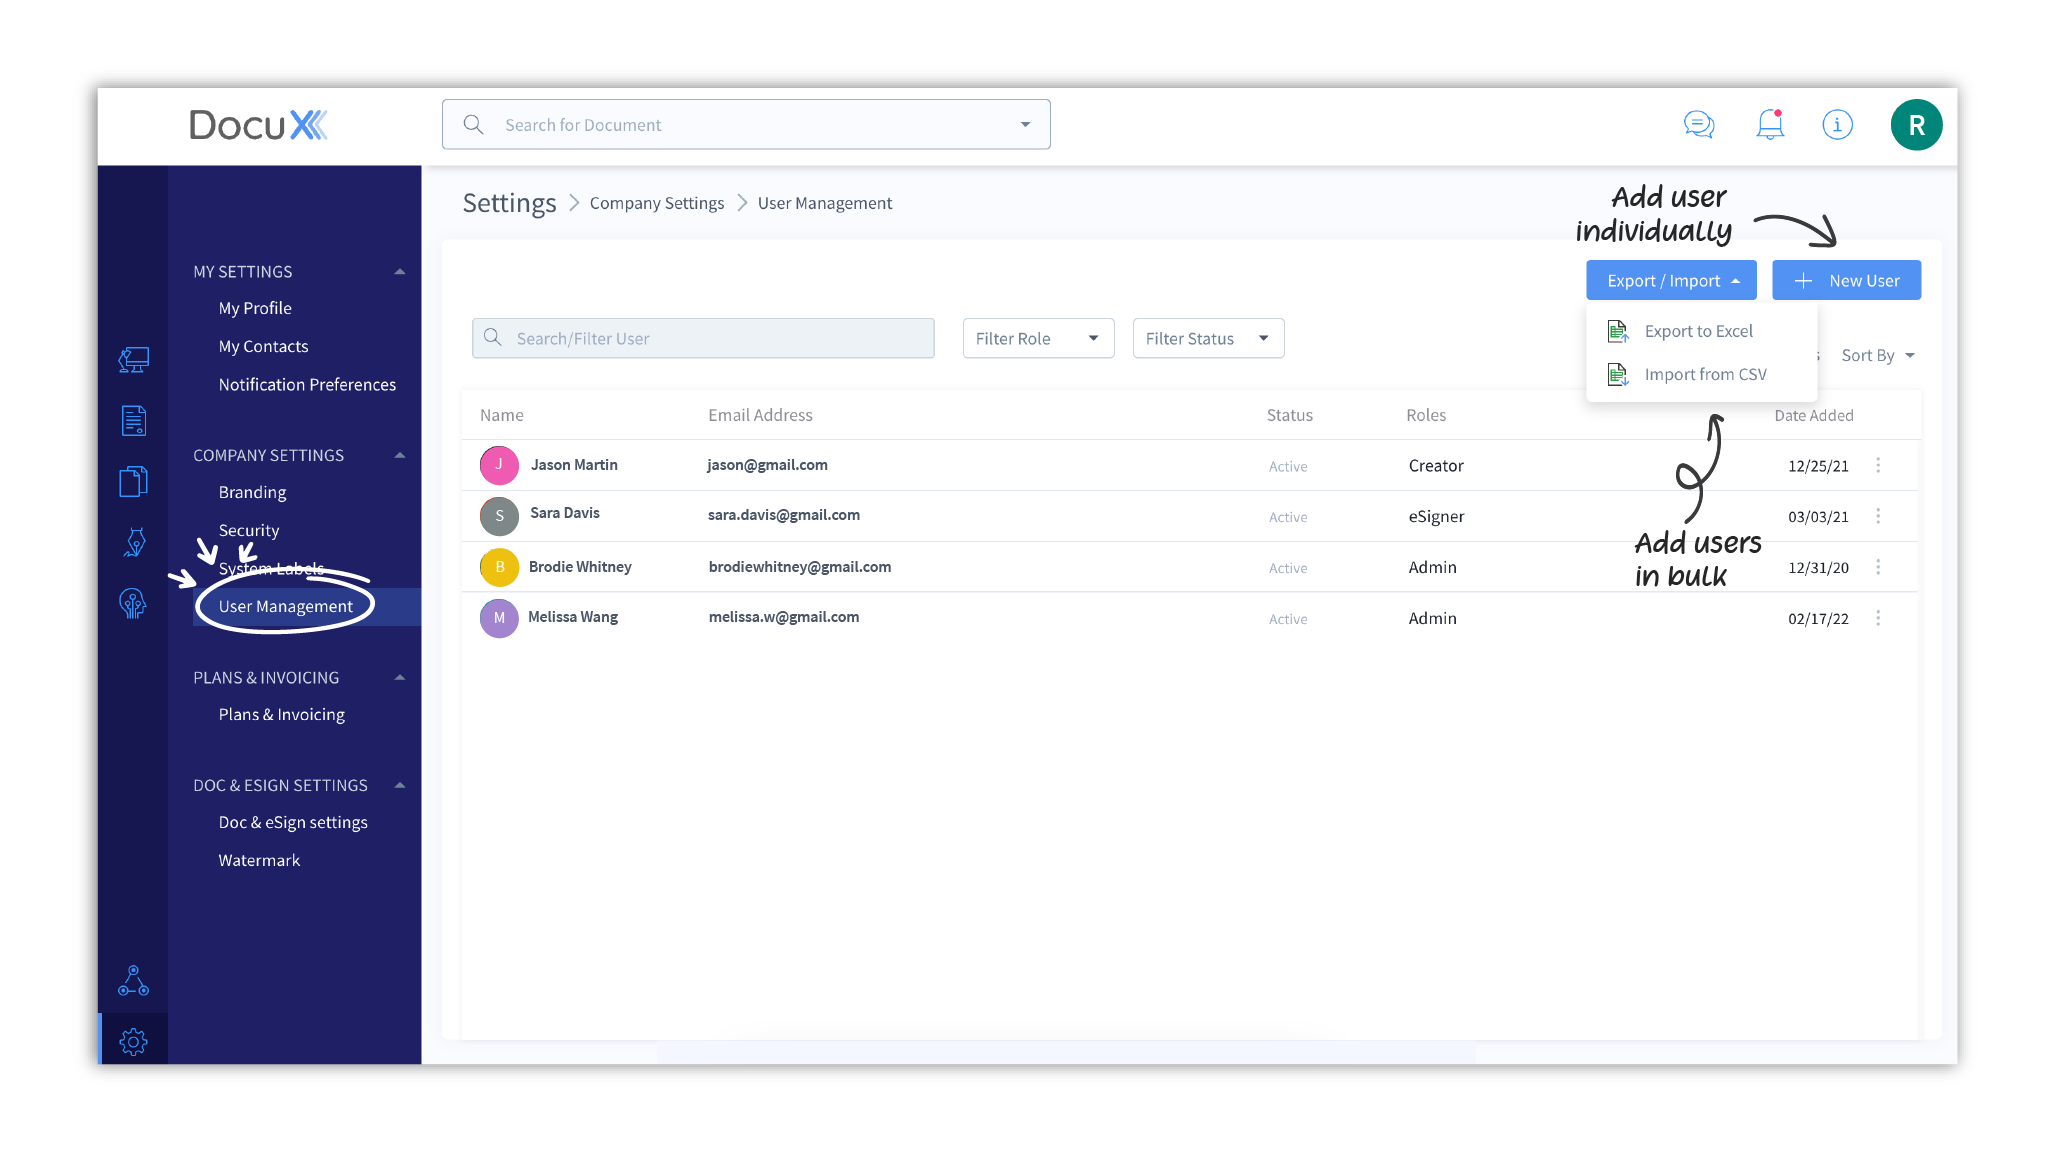
- To add users in bulk, click on Export/Import and choose Import from CSV.
- To add users individually, click on + New User and fill in the details. Click Save.
Once you add team members, an invite email will be sent to them with a link to join DocuX.
The CSV file with details of your team members should have a specific format. Download sample format
Change security settings
Now that you have invited your team members to DocuX, let’s get some security settings in place. This will ensure that your company’s security and privacy policies and requirements are met.
To access the company security settings:
- Click on Settings at the bottom-left of the DocuX menu.
- Click on Security under Company settings.
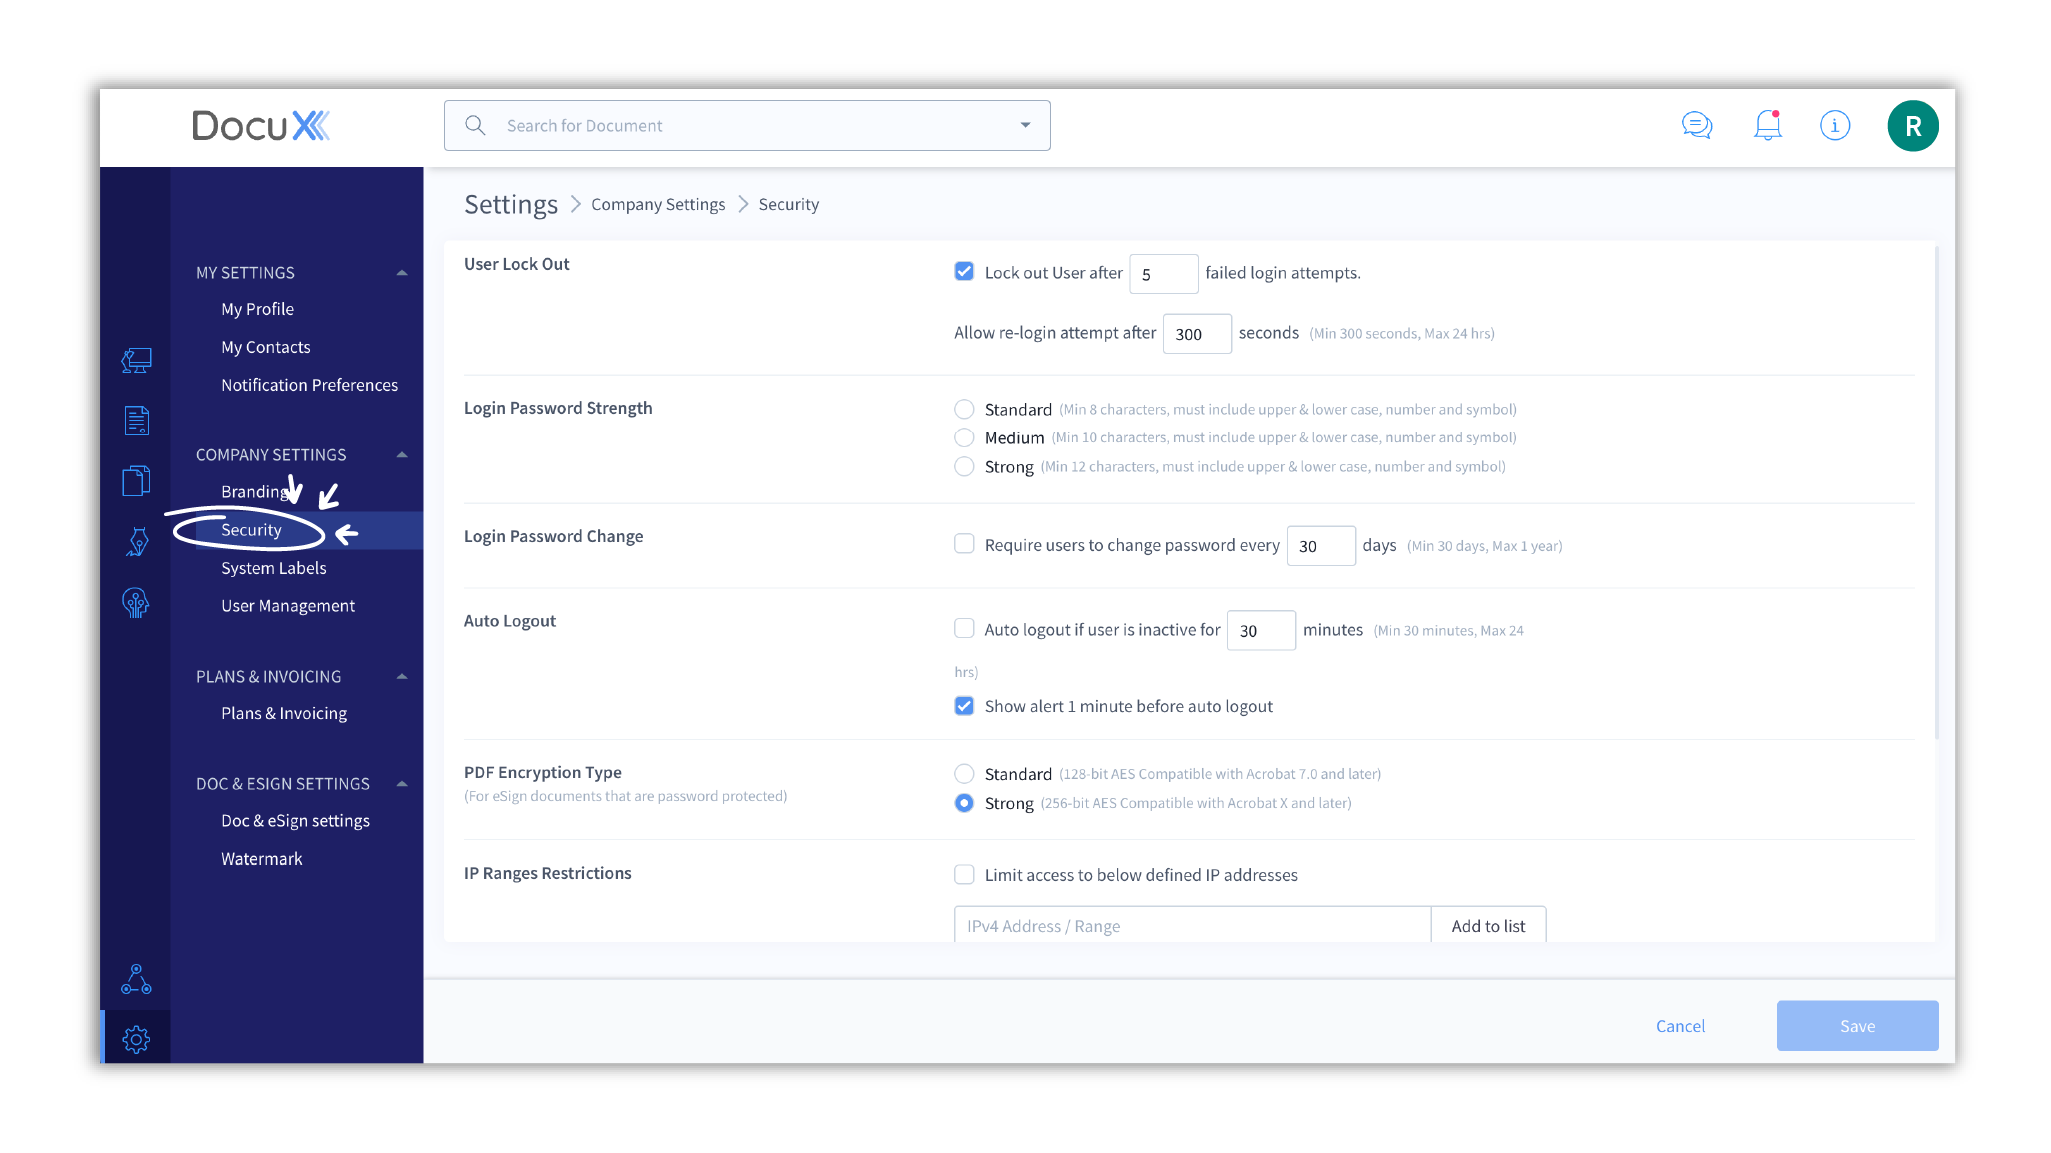
Here’s a quick run-through of the different security settings:
User lock out: If users enter a wrong password or OTP, it is counted as a failed login attempt. Multiple failed attempts could be indicative of unauthorized or malicious intent. User lock out is an effective safety measure against such threats.
Login password strength: Users will be required to set a password of the strength you select.
Login password change: Users will be required to change their passwords at the frequency you select.
Auto logout: Users will be logged out if they are inactive on DocuX for longer than the time limit you set.
PDF encryption type: Set the encryption strength for password protected eSign documents.
IP ranges restrictions: If turned on, only users from the IP addresses your specify will be able to log in to DocuX.
Integrations: You can choose to block or allow third-party integrations available on DocuX to your users.