eSign your first contract
eSign is one of the core features of DocuX. eSignatures done on DocuX are legally-binding, have strong eSigner identity verification in place, and are all stored in one place for easy access and historical reference.
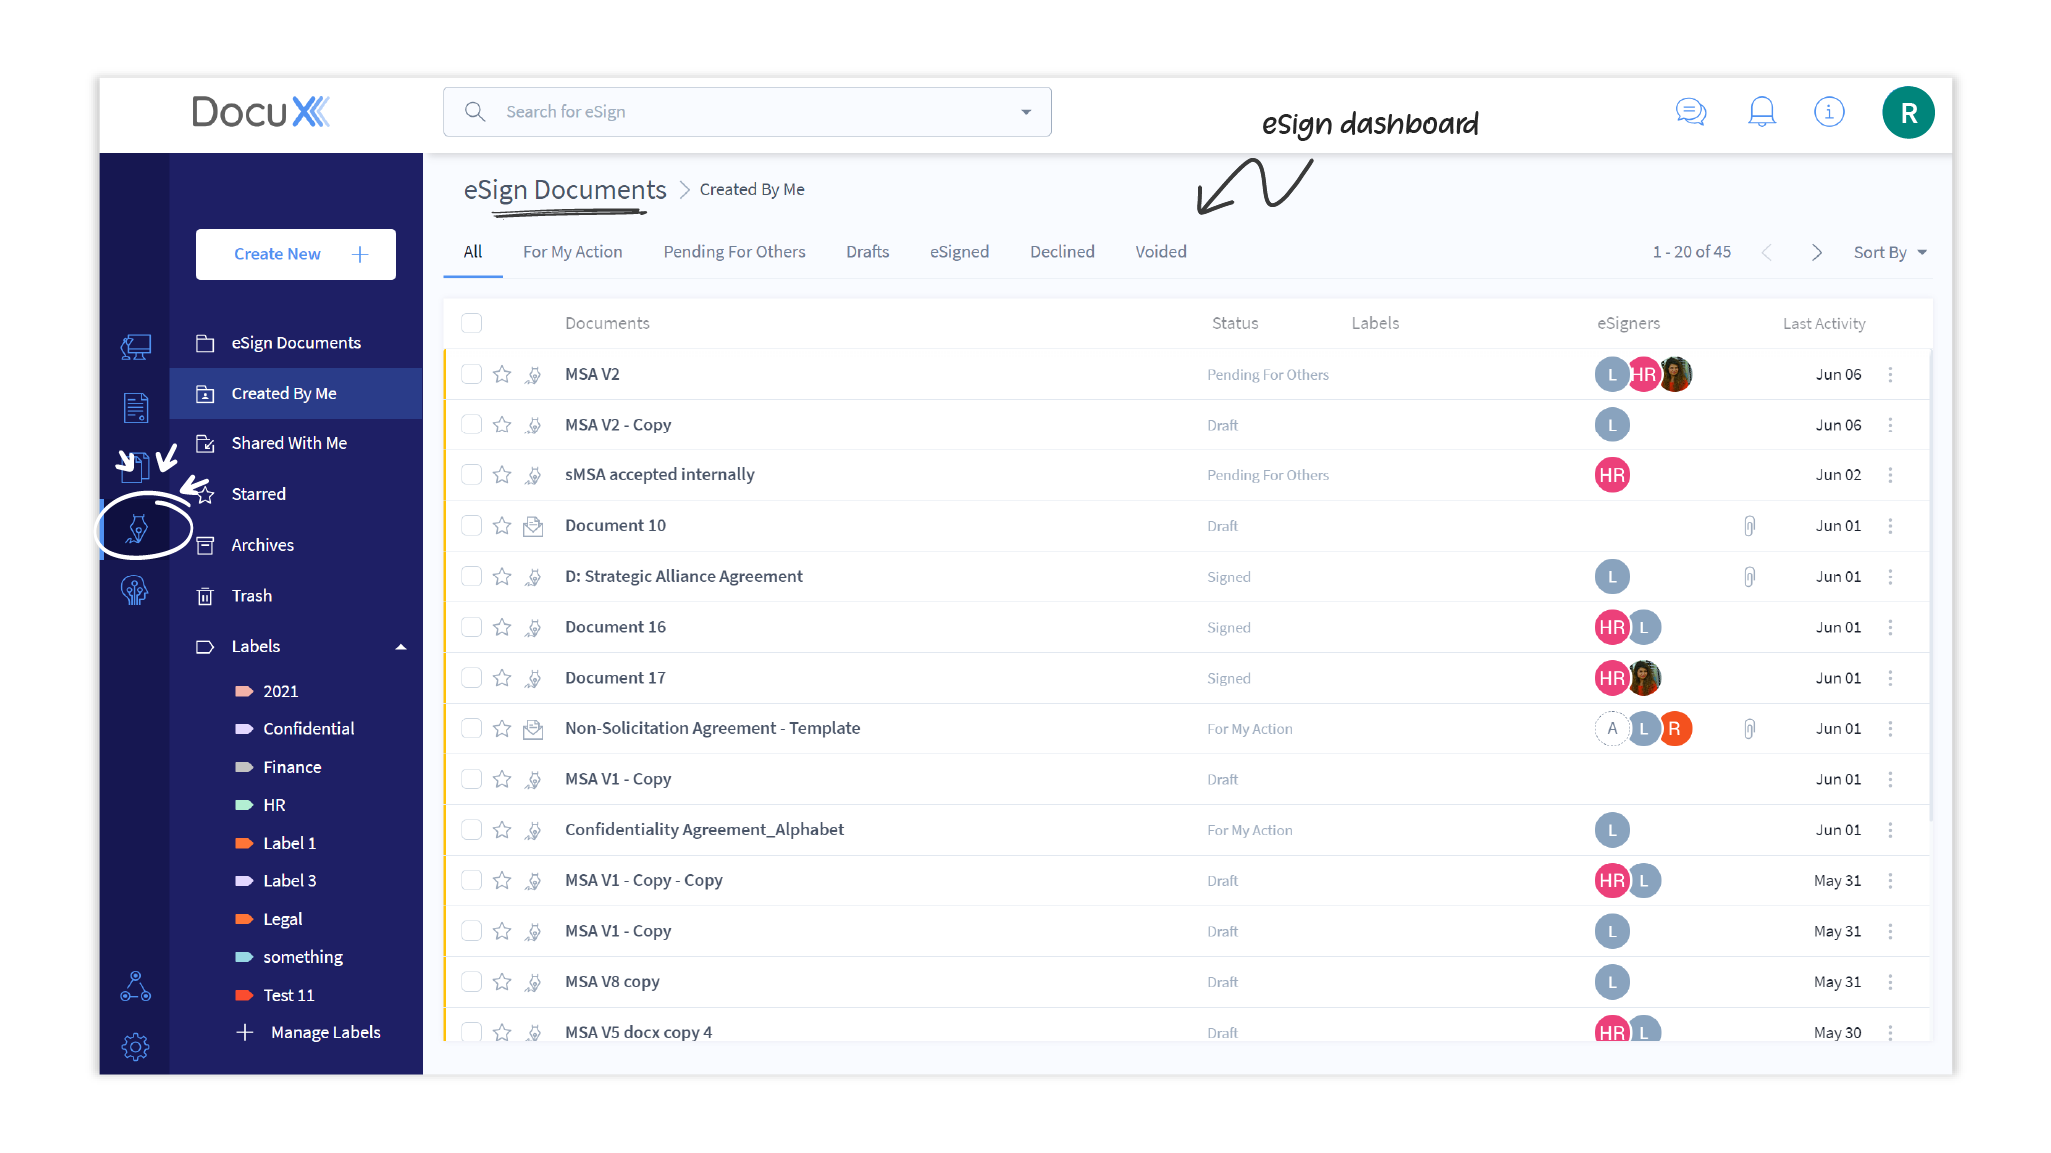
Here’s what the eSign dashboard looks like:
eSign an assigned document
If you have been assigned a document for eSignature, you will find it in your For My Action tab in the Workspace or in your For My Action tab on the eSign dashboard.
To eSign:
- Click on the document to open it.
- You will find the fields you need to fill highlighted in the document and on the Fill and eSign panel.
- Click on the fields in the document and add the appropriate information. Most common fields, including eSign and initials will be autopopulated when you click on them.

- Once all the fields are completed, click on the Finish button at the bottom of the page. You are done!
If you do not agree with the contents of the contract that has been assigned to you for eSignature, you can always decline to eSign by clicking on the Decline button next to Finish.
Get a document eSigned
To get a document eSigned by others:
-
Select or upload the document
- Click on the Create new button and select eSign.
- Choose Upload if you have the document on your device or on cloud storage. You can also select a recent document you created on DocuX or use a template you have created on DocuX.
- Select the document and click on Start eSign.
-
** Add eSigners to the document**. The Manage eSigners panel should be open by default.
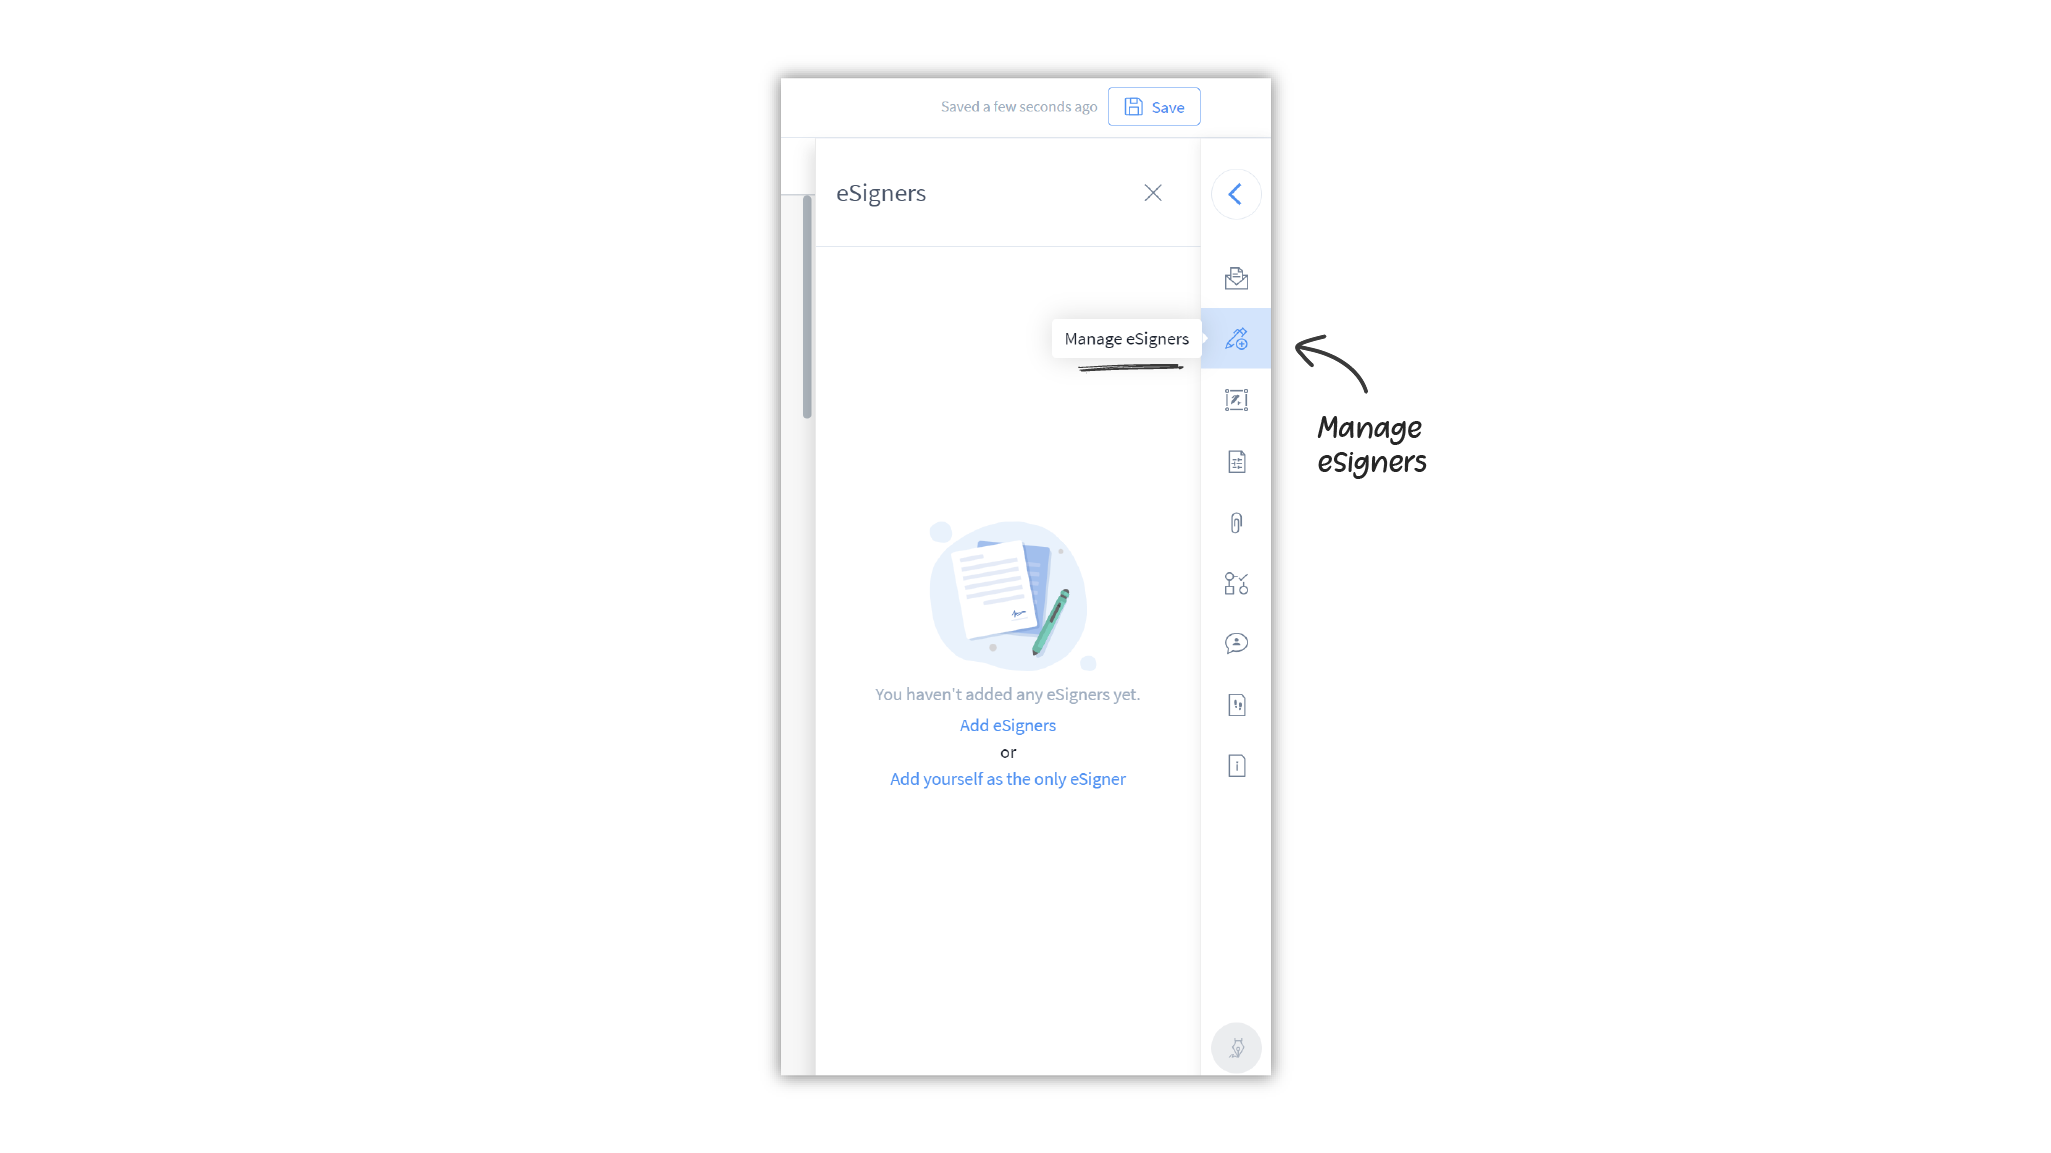
- Click on Add eSigners if you want to get others to eSign your document or click on Add yourself as the only eSigner if you are the only one who will be signing the document.
- If you choose to add other eSigners, you will need to set up the eSign workflow as shown in the next steps.
- Add the eSigners by their name or email.
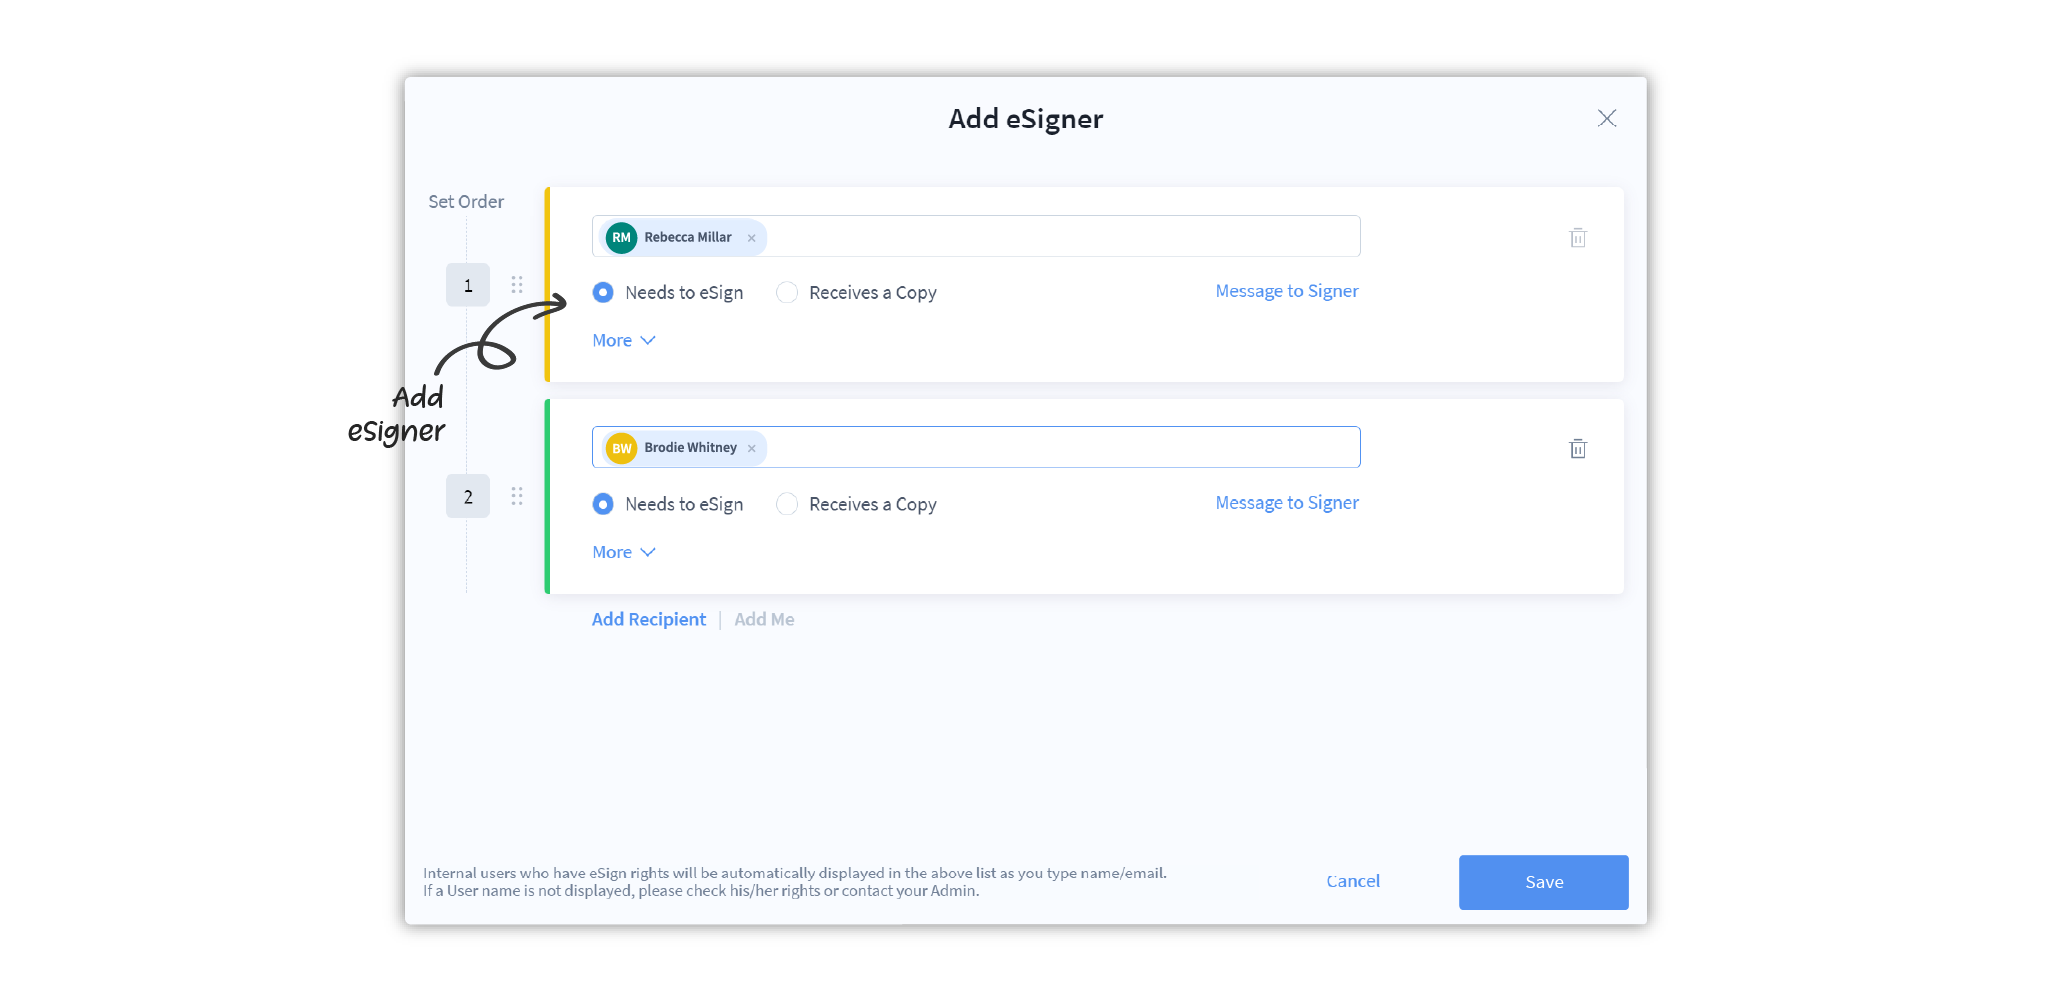
- You can add multiple eSigners and they will receive the document for signatures in the order you define.
- Click Save.
-
Place eSign Stamps
- Click on Fill and eSign (third icon on the right panel in the editor).
- In the Tools section, select an eSigner
- Click on a signature or additional field that you want this eSigner to complete
- Click on the document where you want to place that field. Do not try to drag and drop.
- You can resize and move the field around on the document
- Add more fields for this eSigner if required
- Choose another eSigner and repeat.
- Once you have placed the signature fields for all eSigners, you can send the document to them for eSignature.
-
Send the document for eSign
- Click on **Send for eSign ** at the bottom right corner of the page. If this icon is disabled, ensure that you have added eSigners and placed the signature fields for each on the document.
Your document will now be sent to the first eSigner, then the others in the order you have defined above. Once all eSigners have finished signing, the eSigned document will return to you and all eSigners and recipients will receive a copy of the signed document in their email.
All external eSigners will get a free-for-life Personal account on DocuX.